-
Table of Contents
“Elevate Your Art: Master the Art of Layering UV Resin for Stunning 3D Effects!”
Layering UV resin is a popular technique used to create stunning 3D effects in various crafts and art projects. By applying multiple layers of UV resin, artists can achieve depth, dimension, and intricate designs that enhance the visual appeal of their creations. This process involves careful planning and execution, including the selection of colors, additives, and curing times to ensure each layer adheres properly and maintains clarity. Whether you’re working on jewelry, coasters, or decorative pieces, mastering the art of layering UV resin can elevate your work and allow for endless creative possibilities.
Techniques for Achieving Depth with UV Resin Layers
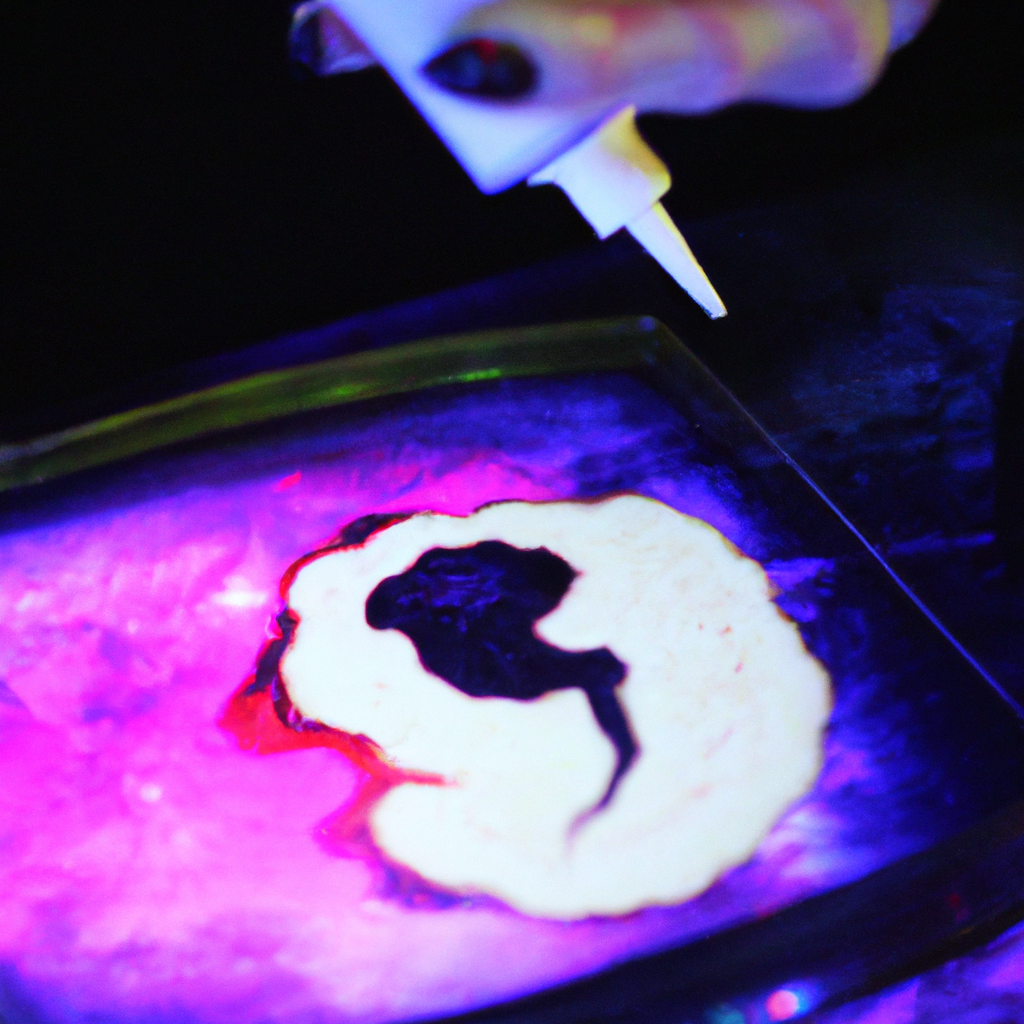
Layering UV resin is an innovative technique that allows artists and crafters to create stunning three-dimensional effects in their projects. By understanding the properties of UV resin and employing specific techniques, one can achieve remarkable depth and dimension in their work. To begin with, it is essential to recognize that UV resin cures quickly when exposed to ultraviolet light, which makes it a versatile medium for layering. However, this rapid curing can also pose challenges, particularly when attempting to create intricate layers that blend seamlessly.
One effective technique for achieving depth is to start with a solid base layer. This foundational layer serves as the canvas upon which subsequent layers will be built. It is advisable to pour a thin layer of UV resin and allow it to cure partially before adding additional layers. This partial curing creates a tacky surface that promotes adhesion between layers, ensuring that they bond effectively. As the base layer cures, it is crucial to monitor the process closely, as over-curing can lead to a glossy finish that may hinder the adhesion of subsequent layers.
Once the base layer is established, artists can begin to introduce additional layers, each with its unique characteristics. For instance, incorporating pigments or dyes into the resin can create vibrant colors that enhance the visual appeal of the piece. When adding color, it is beneficial to use transparent or translucent pigments, as these allow light to pass through, contributing to the overall depth of the artwork. By layering different colors, one can achieve a gradient effect that adds dimension and complexity to the piece.
Moreover, incorporating various materials between layers can further enhance the three-dimensional effect. Items such as dried flowers, glitter, or small beads can be embedded within the resin, creating a sense of depth and intrigue. When placing these materials, it is essential to ensure they are evenly distributed and not overcrowded, as this can detract from the overall aesthetic. Additionally, allowing each layer to cure before adding the next is crucial, as this prevents the materials from sinking or shifting during the curing process.
Another technique to consider is the use of molds to create specific shapes and textures within the layers. Silicone molds can be particularly effective, as they allow for intricate designs that can be layered to create a more dynamic appearance. By pouring resin into molds and allowing them to cure separately, artists can create distinct elements that can be incorporated into the final piece. Once these elements are cured, they can be arranged and layered with additional resin to create a cohesive design that showcases depth and complexity.
Furthermore, manipulating the viscosity of the resin can also contribute to the layering effect. By using a thicker resin for certain layers, artists can create a more pronounced separation between layers, enhancing the perception of depth. Conversely, a thinner resin can be used for top layers to create a smooth finish that allows the underlying layers to remain visible. This interplay between different viscosities can lead to a captivating visual experience.
In conclusion, layering UV resin to achieve depth involves a combination of techniques that emphasize careful planning and execution. By starting with a solid base, incorporating color and materials, utilizing molds, and manipulating viscosity, artists can create stunning three-dimensional effects that captivate the viewer. As with any artistic endeavor, practice and experimentation are key to mastering these techniques, allowing for the development of a unique style that showcases the beauty of layered UV resin.
Color Blending Strategies for Multi-Layered UV Resin Projects
Color blending in multi-layered UV resin projects is an essential technique that can elevate the aesthetic appeal of your creations, allowing for stunning visual effects that capture the eye. To achieve a seamless transition between colors, it is crucial to understand the properties of UV resin and how different pigments interact with one another. By employing effective color blending strategies, you can create depth and dimension in your work, resulting in captivating 3D effects.
One of the foundational aspects of color blending in UV resin is the selection of pigments. There are various types of pigments available, including opaque, transparent, and translucent options. Transparent pigments are particularly useful for layering, as they allow the underlying colors to show through, creating a more dynamic visual experience. When choosing your pigments, consider how they will interact with one another. For instance, layering a transparent blue over a white base can produce a soft, ethereal effect, while using an opaque color may result in a more solid appearance. Understanding the characteristics of your chosen pigments will enable you to make informed decisions that enhance your project.
Once you have selected your pigments, the next step is to plan your layering strategy. It is advisable to start with a base layer that serves as the foundation for your design. This base layer can be a solid color or a gradient, depending on the desired outcome. After curing the base layer under UV light, you can begin to add additional layers. When applying these layers, consider the order in which you introduce colors. For example, placing lighter colors on top of darker ones can create a sense of luminosity, while layering darker colors beneath lighter ones can add depth.
As you progress through your layering process, blending techniques become crucial. One effective method is to use a toothpick or a small brush to swirl colors together at the edges where they meet. This technique can create a soft transition between colors, mimicking the natural blending found in nature. Additionally, you can experiment with different application methods, such as pouring or dripping, to achieve unique effects. Pouring resin in a controlled manner can allow for a more organic blend, while dripping can create interesting patterns and textures.
Moreover, timing plays a significant role in the blending process. UV resin cures quickly, so it is essential to work efficiently. If you wish to blend colors directly, you must do so before the resin begins to set. However, if you prefer to create distinct layers, allow each layer to cure fully before adding the next. This approach not only prevents unwanted mixing but also allows for greater control over the final appearance of your project.
In addition to these techniques, consider incorporating additives such as glitter or metallic powders to enhance your color blending. These materials can add an extra dimension to your layers, catching the light and creating a shimmering effect that draws attention. When using additives, be mindful of their opacity and how they will interact with your base colors.
In conclusion, mastering color blending strategies in multi-layered UV resin projects requires a thoughtful approach to pigment selection, layering order, blending techniques, and timing. By understanding these elements and experimenting with different methods, you can create stunning 3D effects that showcase your artistic vision. As you refine your skills, you will find that the possibilities for creativity are virtually limitless, allowing you to produce unique and captivating pieces that stand out in the world of resin art.
Best Practices for Curing and Finishing Layered UV Resin Creations
When working with UV resin to create layered 3D effects, understanding the best practices for curing and finishing your creations is essential for achieving optimal results. The curing process is critical, as it determines the clarity, strength, and overall appearance of the final piece. To begin with, it is important to ensure that each layer of resin is cured properly before adding subsequent layers. This not only prevents the layers from mixing but also allows for a more defined separation between them, enhancing the three-dimensional effect.
To achieve effective curing, it is advisable to use a UV light source that emits the appropriate wavelength for the resin you are using. Most UV resins cure best under UV-A light, typically around 365 to 405 nanometers. Positioning the light source at an appropriate distance from the resin is also crucial; too far away may result in incomplete curing, while too close can lead to overheating and distortion of the resin. A distance of about 6 to 12 inches is generally recommended, but this may vary based on the specific light and resin being used.
Moreover, curing times can vary depending on the thickness of the layer and the intensity of the UV light. Thinner layers generally cure faster, often within a few minutes, while thicker layers may require longer exposure. It is wise to consult the manufacturer’s guidelines for specific curing times and adjust based on your observations. Additionally, rotating the piece during the curing process can help ensure even exposure to the UV light, preventing any uncured spots that could compromise the integrity of the layered design.
Once the layers are cured, the finishing process becomes paramount in achieving a polished look. Sanding is often necessary to smooth out any imperfections or to create a better surface for subsequent layers. When sanding, it is advisable to start with a coarser grit and gradually move to finer grits to achieve a smooth finish. This method not only enhances the aesthetic quality of the piece but also improves adhesion for any additional layers or coatings.
After sanding, cleaning the surface is essential to remove any dust or debris that may have accumulated. A gentle wash with soap and water, followed by a rinse and thorough drying, will prepare the surface for any final touches. If desired, a topcoat of clear UV resin can be applied to enhance the gloss and depth of the layered effects. This final layer should be cured in the same manner as the previous layers, ensuring that it is evenly exposed to the UV light.
In addition to these practices, it is important to consider the environment in which you are working. A dust-free, well-ventilated area will help prevent contaminants from settling on your resin and ensure a safer working environment. Furthermore, wearing appropriate personal protective equipment, such as gloves and a mask, is advisable to protect against any potential hazards associated with resin use.
In conclusion, mastering the best practices for curing and finishing layered UV resin creations is vital for achieving stunning 3D effects. By ensuring proper curing, employing effective sanding techniques, and maintaining a clean workspace, artists can elevate their resin projects to new heights, resulting in beautiful, durable pieces that showcase their creativity and skill.
Q&A
1. **Question:** What is the first step in layering UV resin for 3D effects?
**Answer:** The first step is to prepare your mold and ensure it is clean and dry before pouring the first layer of UV resin.
2. **Question:** How do you achieve different depths in your layered UV resin project?
**Answer:** To achieve different depths, pour a thin layer of UV resin, cure it under UV light, and then add additional layers, allowing each layer to cure before adding the next.
3. **Question:** What techniques can be used to create textures or effects between layers of UV resin?
**Answer:** You can use items like glitter, pigments, or inclusions between layers, or manipulate the resin with tools to create textures before curing each layer.To effectively layer UV resin for 3D effects, start by preparing a clean, dust-free workspace and selecting your desired molds or surfaces. Apply a base layer of UV resin and cure it under a UV light until solid. For added depth, mix pigments or inclusions into subsequent layers, allowing each layer to cure fully before adding the next. Use a heat gun or torch to eliminate bubbles and ensure a smooth finish. Finally, seal the piece with a top layer of clear UV resin for a glossy finish. This method enhances the visual appeal and creates striking 3D effects in your resin projects.