-
Table of Contents
“Master the Art of Resin: Tips for Achieving Flawlessly Smooth Surfaces!”
Achieving smooth resin surfaces is essential for both aesthetic appeal and functional performance in various projects, from art pieces to functional items. The process requires careful attention to detail, proper material selection, and effective techniques. This guide provides essential tips to help you master the art of resin application, ensuring a flawless finish that enhances the overall quality of your work. Whether you are a beginner or an experienced resin artist, these strategies will help you achieve the desired smoothness and clarity in your resin surfaces.
Surface Preparation Techniques
Achieving smooth resin surfaces is a critical aspect of resin casting and finishing, as it significantly impacts the aesthetic and functional qualities of the final product. To begin with, effective surface preparation is paramount, as it lays the foundation for a flawless finish. The initial step in this process involves selecting the appropriate substrate. Whether working with wood, metal, or plastic, it is essential to ensure that the surface is clean, dry, and free from contaminants. Any dust, grease, or moisture can lead to adhesion issues, resulting in imperfections that compromise the overall quality of the resin surface.
Once the substrate is chosen, the next step is to thoroughly clean it. This can be achieved using a suitable solvent, such as isopropyl alcohol or acetone, which effectively removes oils and residues. After cleaning, it is advisable to allow the surface to dry completely before proceeding. This drying phase is crucial, as any residual moisture can interfere with the resin’s ability to bond effectively, leading to a less than optimal finish.
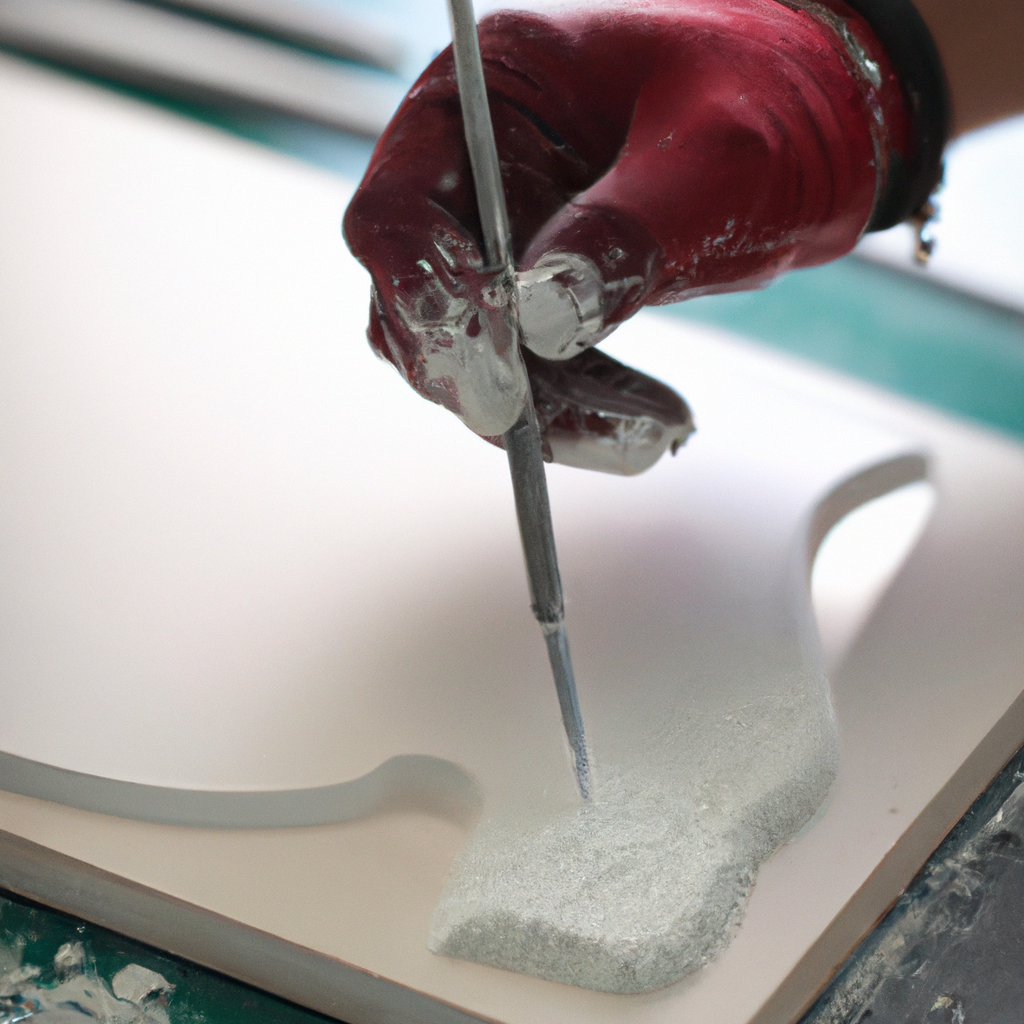
Following the cleaning process, sanding the surface is an important technique that can significantly enhance the smoothness of the final resin layer. Utilizing a range of sandpaper grits, starting from a coarser grit and gradually moving to finer grits, allows for the removal of any imperfections and creates a surface profile that promotes better adhesion. It is essential to sand evenly and avoid creating deep scratches, as these can become visible in the final resin layer. After sanding, it is important to clean the surface again to remove any dust particles generated during this process.
In addition to sanding, applying a primer can further improve the surface preparation. A primer not only enhances adhesion but also helps to seal the substrate, preventing any potential reactions between the resin and the underlying material. When selecting a primer, it is crucial to choose one that is compatible with the type of resin being used. This compatibility ensures that the primer does not interfere with the curing process or the final appearance of the resin surface.
Moreover, temperature and humidity play significant roles in the resin application process. It is advisable to work in a controlled environment where the temperature and humidity levels are optimal for resin curing. High humidity can lead to issues such as cloudiness or improper curing, while low temperatures can slow down the curing process, resulting in a less smooth finish. Therefore, monitoring these environmental factors is essential for achieving the desired results.
Once the surface is prepared and the resin is mixed according to the manufacturer’s instructions, pouring the resin should be done carefully to minimize bubbles and imperfections. Pouring slowly and from a height can help reduce the introduction of air into the mixture. Additionally, using a heat gun or torch to gently pass over the surface after pouring can assist in releasing trapped air bubbles, further contributing to a smooth finish.
In conclusion, achieving smooth resin surfaces requires meticulous attention to surface preparation techniques. By selecting the right substrate, thoroughly cleaning and sanding the surface, applying a compatible primer, and controlling environmental conditions, one can significantly enhance the quality of the final resin product. These preparatory steps are essential for ensuring that the resin adheres properly and cures to a flawless finish, ultimately leading to a successful outcome in any resin project.
Optimal Mixing Ratios
Achieving smooth resin surfaces is a critical aspect of resin art and crafting, and one of the foundational elements that significantly influences the final outcome is the optimal mixing ratio of the resin components. Understanding the importance of precise measurements and the chemistry behind resin mixing can greatly enhance the quality of the finished product. When working with epoxy resin, it is essential to adhere to the manufacturer’s recommended mixing ratios, which typically involve a specific proportion of resin to hardener. This ratio is crucial because it determines the chemical reaction that occurs during the curing process. Deviating from these guidelines can lead to a variety of issues, including incomplete curing, sticky surfaces, or even a cloudy appearance.
To begin with, it is vital to use accurate measuring tools, such as graduated cups or digital scales, to ensure that the resin and hardener are mixed in the correct proportions. Many manufacturers provide mixing ratios by weight or volume, and it is important to follow the specified method. For instance, if the instructions indicate a 2:1 ratio by volume, this means that for every two parts of resin, one part of hardener should be added. Conversely, if the ratio is given by weight, it is essential to convert the measurements accordingly to maintain consistency. This precision is not merely a suggestion; it is a requirement for achieving optimal results.
Moreover, the mixing process itself plays a significant role in the quality of the final surface. After measuring the components accurately, it is crucial to mix them thoroughly. This involves stirring the resin and hardener together for several minutes, ensuring that the two components are fully integrated. During this process, it is advisable to scrape the sides and bottom of the mixing container to incorporate any unmixed material. Inadequate mixing can lead to areas of uncured resin, resulting in a tacky or uneven surface. Therefore, patience and diligence during this stage are paramount.
In addition to the mixing ratio and technique, environmental factors can also impact the curing process. Temperature and humidity levels can affect how resin cures, and it is generally recommended to work in a controlled environment. Ideally, the temperature should be between 70°F and 80°F (21°C to 27°C) for optimal curing. If the temperature is too low, the curing process may slow down, leading to a longer wait time for the resin to harden completely. Conversely, high temperatures can accelerate curing, which may not allow sufficient time for proper mixing and application.
Furthermore, it is essential to consider the type of resin being used, as different formulations may have varying mixing ratios and curing characteristics. For instance, some resins are designed for specific applications, such as casting or coating, and understanding these distinctions can help in selecting the right product for the desired outcome. Additionally, experimenting with small batches can provide valuable insights into how different ratios and mixing techniques affect the final surface quality.
In conclusion, achieving smooth resin surfaces hinges on the careful consideration of optimal mixing ratios, accurate measurement, thorough mixing, and environmental conditions. By adhering to these guidelines, artisans and crafters can significantly improve their results, leading to stunning, professional-quality finishes in their resin projects. Ultimately, the attention to detail in the mixing process lays the groundwork for a successful and satisfying resin crafting experience.
Finishing Methods for a Flawless Finish
Achieving a smooth resin surface is a critical aspect of resin art and crafting, as it not only enhances the aesthetic appeal but also ensures durability and functionality. To attain a flawless finish, several finishing methods can be employed, each with its unique advantages and techniques. Understanding these methods is essential for both novice and experienced resin artists seeking to elevate their work.
One of the most effective finishing methods is sanding, which involves using various grits of sandpaper to gradually refine the surface of the cured resin. Initially, it is advisable to start with a coarser grit, such as 80 or 120, to remove any imperfections or bubbles that may have formed during the curing process. As the surface becomes smoother, transitioning to finer grits, such as 220, 400, and ultimately 600, will help achieve a polished finish. It is crucial to sand in a circular motion and to keep the surface wet to minimize dust and prevent overheating, which can damage the resin. After sanding, cleaning the surface with a damp cloth will remove any residue, preparing it for the next finishing step.
Following sanding, polishing is an essential technique that can significantly enhance the clarity and shine of the resin surface. Polishing compounds, such as those used for automotive finishes, can be applied with a soft cloth or a buffing wheel. This process not only brings out the luster of the resin but also helps to eliminate any fine scratches left from sanding. It is important to apply the polishing compound in small amounts and to work in sections to ensure an even finish. Additionally, using a microfiber cloth can prevent the introduction of new scratches while buffing.
Another method to consider is applying a clear topcoat, which serves as a protective layer over the resin surface. This is particularly beneficial for pieces that will be exposed to the elements or frequent handling. Clear acrylic sprays or polyurethane finishes can be used, depending on the desired effect and the specific requirements of the project. When applying a topcoat, it is essential to ensure that the resin is fully cured and free of dust or debris. Light, even coats should be applied, allowing each layer to dry completely before adding the next. This technique not only enhances the overall appearance but also provides additional protection against UV rays and scratches.
In addition to these methods, utilizing heat can also improve the finish of resin surfaces. A heat gun or torch can be used to gently warm the surface, which helps to eliminate small bubbles and imperfections. However, caution must be exercised to avoid overheating, which can lead to warping or discoloration. A careful approach, with the heat source held at a safe distance, will yield the best results.
Ultimately, achieving a smooth resin surface requires patience and attention to detail. By employing a combination of sanding, polishing, applying a clear topcoat, and utilizing heat, artists can significantly enhance the quality of their resin projects. Each method contributes to the overall finish, ensuring that the final product is not only visually appealing but also durable and long-lasting. As with any craft, practice and experimentation will lead to improved techniques and results, allowing artists to develop their unique finishing styles over time.
Q&A
1. **Question:** What is the ideal temperature for pouring resin to achieve a smooth surface?
**Answer:** The ideal temperature for pouring resin is between 70°F to 75°F (21°C to 24°C) to ensure proper curing and minimize bubbles.
2. **Question:** How can I prevent bubbles from forming in my resin?
**Answer:** To prevent bubbles, mix the resin slowly and use a heat gun or torch to gently pass over the surface after pouring to pop any trapped air.
3. **Question:** What should I do if my resin surface is still uneven after curing?
**Answer:** If the surface is uneven, you can sand it down with fine-grit sandpaper and then apply a thin layer of fresh resin to create a smooth finish.To achieve smooth resin surfaces, it is essential to follow a series of best practices: ensure proper mixing of resin and hardener, use high-quality materials, maintain a dust-free environment, apply thin layers, and utilize heat sources to eliminate bubbles. Additionally, sanding between layers and applying a final polish can enhance the surface finish. By adhering to these tips, one can achieve a professional-looking, smooth resin surface that enhances the overall aesthetic and durability of the project.