-
Table of Contents
“Craft Your Holiday Spirit: Create Stunning Christmas Resin Ornaments!”
Creating Christmas resin ornaments is a delightful way to add a personal touch to your holiday decorations. This craft allows you to encapsulate cherished memories, seasonal themes, and vibrant colors in beautiful, durable ornaments that can be cherished for years to come. With a few simple materials and some creativity, you can design unique pieces that reflect your style and the spirit of the season. Whether you’re making them as gifts or for your own tree, this guide will walk you through the essential steps to craft stunning resin ornaments that will brighten your holiday celebrations.
Choosing the Right Resin for Christmas Ornaments
When embarking on the delightful journey of creating Christmas resin ornaments, one of the most crucial decisions you will face is selecting the right type of resin. The choice of resin not only influences the final appearance of your ornaments but also affects their durability and ease of use. Therefore, understanding the various types of resin available on the market is essential for achieving the best results in your holiday crafting endeavors.
Epoxy resin is one of the most popular choices for making Christmas ornaments due to its clarity and strength. This type of resin cures to a hard, glossy finish, which enhances the visual appeal of any embedded decorations, such as glitter, dried flowers, or small figurines. Moreover, epoxy resin is relatively easy to work with, as it typically has a longer working time, allowing crafters to manipulate and adjust their designs before the resin sets. However, it is important to note that epoxy resin can be sensitive to temperature and humidity, so ensuring a controlled environment during the curing process is vital for optimal results.
Another option to consider is polyurethane resin, which is known for its exceptional durability and resistance to yellowing over time. This makes it an excellent choice for ornaments that will be displayed in bright light or exposed to varying temperatures. Polyurethane resin generally cures faster than epoxy resin, which can be advantageous for those looking to complete their projects in a shorter timeframe. However, it is essential to handle polyurethane resin with care, as it can emit strong fumes during the curing process. Therefore, working in a well-ventilated area and using appropriate personal protective equipment is highly recommended.
For those seeking a more eco-friendly alternative, bio-resin is gaining popularity in the crafting community. Made from renewable resources, bio-resin offers a sustainable option without compromising on quality. While it may not have the same level of clarity as epoxy or polyurethane resins, advancements in technology have significantly improved its performance. Bio-resin can be an excellent choice for environmentally conscious crafters who wish to create beautiful ornaments while minimizing their ecological footprint.
In addition to the type of resin, it is also important to consider the specific formulation of the resin you choose. Some resins are designed specifically for casting, while others are better suited for coating applications. For Christmas ornaments, a casting resin is typically preferred, as it allows for the creation of three-dimensional shapes and the embedding of decorative elements. Furthermore, many resins come in various colors and finishes, enabling crafters to customize their ornaments to match their holiday decor.
As you navigate the selection process, it is also wise to read reviews and seek recommendations from fellow crafters. Online forums and social media groups can provide valuable insights into the performance of different resins, helping you make an informed decision. Additionally, consider starting with small test projects to familiarize yourself with the resin’s properties and curing times before committing to larger ornaments.
Ultimately, the right resin for your Christmas ornaments will depend on your specific needs and preferences. By carefully considering the characteristics of each type of resin, you can ensure that your creations not only capture the spirit of the season but also stand the test of time. With the right materials in hand, you will be well on your way to crafting beautiful, personalized ornaments that can be cherished for years to come.
Step-by-Step Guide to Creating Resin Ornaments
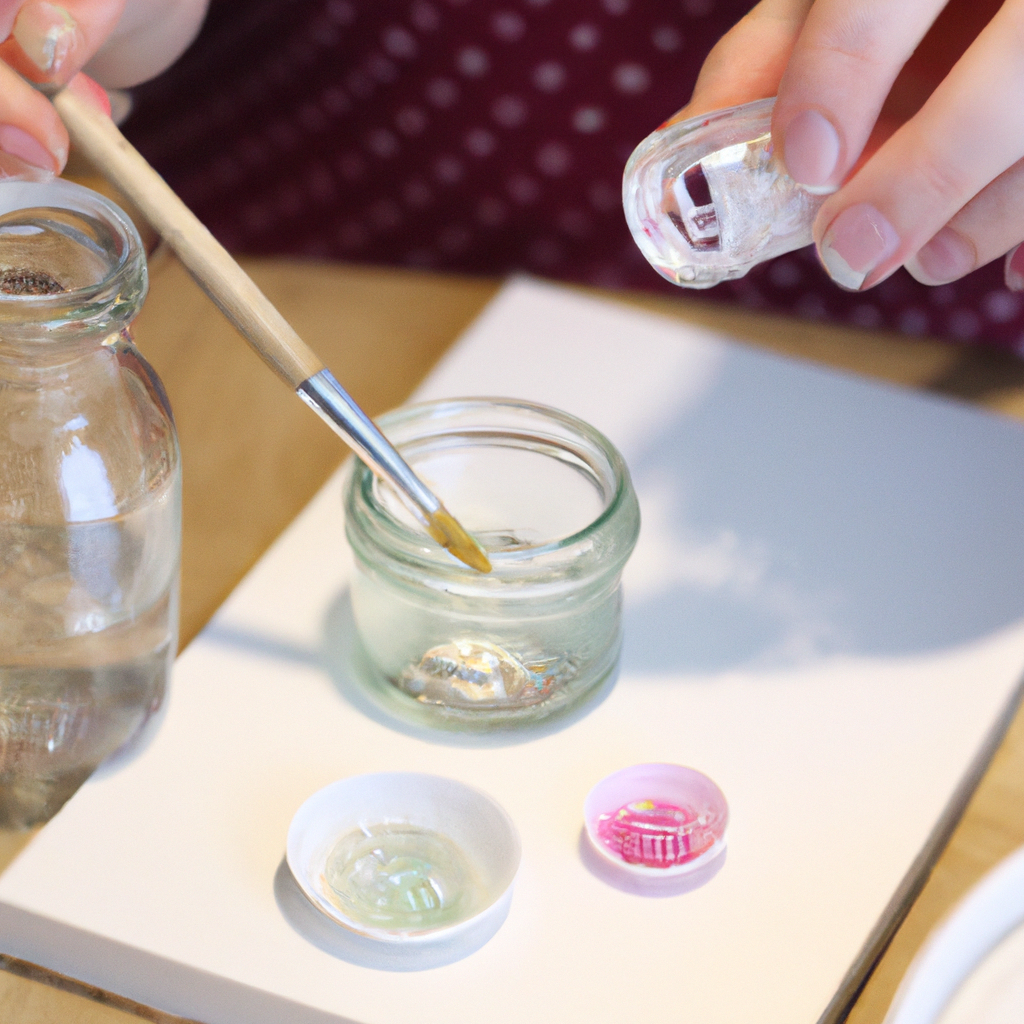
Creating Christmas resin ornaments is a delightful way to add a personal touch to your holiday decorations. This step-by-step guide will walk you through the process, ensuring that you achieve beautiful results while enjoying the creative journey. To begin, gather all necessary materials, which include epoxy resin, a hardener, silicone molds, decorative elements such as glitter, dried flowers, or small figurines, and essential tools like mixing cups, stir sticks, and gloves. It is crucial to work in a well-ventilated area, as the resin can emit fumes during the curing process.
Once you have assembled your materials, the next step is to prepare your workspace. Cover surfaces with plastic or newspaper to protect them from spills, and ensure that you have adequate lighting. After setting up your workspace, you can begin measuring the resin and hardener. It is essential to follow the manufacturer’s instructions regarding the mixing ratio, as this will affect the curing process and the final appearance of your ornaments. Typically, the ratio is one part resin to one part hardener, but variations may exist depending on the specific product used.
With the resin and hardener measured, pour them into a mixing cup. Using a stir stick, mix the two components thoroughly for at least three minutes, ensuring that you scrape the sides and bottom of the cup to incorporate all the material. This step is critical, as improper mixing can lead to cloudy or improperly cured ornaments. Once the mixture is clear and well combined, you can add any decorative elements you desire. For instance, if you wish to create a festive look, consider incorporating red and green glitter or small pinecones. Stir these elements gently into the resin to avoid creating bubbles.
After preparing your resin mixture, it is time to pour it into the silicone molds. Carefully fill each mold, taking care not to overfill, as the resin may expand slightly during the curing process. If you notice any bubbles forming on the surface, you can use a heat gun or a lighter to gently pass over the surface, which will help to pop the bubbles. This step is essential for achieving a smooth finish on your ornaments. Once the molds are filled, allow the resin to cure according to the manufacturer’s instructions, which typically ranges from 24 to 48 hours.
As the curing process concludes, you can begin to demold your ornaments. Gently flex the silicone mold to release the resin pieces, taking care not to apply too much force, as this could cause breakage. Once removed, inspect each ornament for any imperfections. If necessary, you can sand down rough edges or apply a clear coat to enhance the shine. To add a finishing touch, consider drilling a small hole at the top of each ornament for hanging. This can be done using a small drill or a heated tool, ensuring that you create a clean and precise hole.
Finally, thread a ribbon or string through the hole, allowing you to hang your beautiful creations on the tree or around your home. By following these steps, you will not only create stunning Christmas resin ornaments but also enjoy a fulfilling crafting experience. Each ornament will serve as a unique representation of your creativity, making your holiday season even more special.
Decorating Techniques for Stunning Christmas Resin Ornaments
Creating stunning Christmas resin ornaments involves a blend of creativity and technique, allowing crafters to produce unique pieces that can enhance holiday decor. To begin with, selecting the right resin is crucial. Epoxy resin is often favored for its clarity and durability, making it ideal for ornaments that will be cherished for years. Once the resin is chosen, the next step is to gather materials for decoration. This can include glitter, dried flowers, pigments, and even small figurines, all of which can add a personal touch to the ornaments.
When preparing to decorate, it is essential to work in a well-ventilated area and to wear protective gear, such as gloves and a mask, to ensure safety while handling resin. After setting up a clean workspace, the first technique to consider is layering. By pouring a thin layer of resin into the mold and allowing it to partially cure, crafters can create a base layer that can be adorned with decorative elements. For instance, sprinkling glitter or placing dried flowers on this initial layer can create a beautiful effect. Once the first layer has cured sufficiently, additional layers of resin can be poured to encapsulate the decorations, resulting in a stunning three-dimensional appearance.
Another effective technique is the use of color pigments. By mixing resin with various pigments, crafters can achieve vibrant hues that can be swirled or layered to create a marbled effect. This technique not only adds depth to the ornaments but also allows for endless customization. For those who prefer a more uniform look, solid colors can be poured directly into the mold, providing a sleek and modern aesthetic. Additionally, metallic pigments can be used to create a shimmering effect that captures the light beautifully, making the ornaments stand out on the Christmas tree.
Incorporating natural elements is another popular decorating technique. For example, small pinecones, twigs, or even tiny ornaments can be embedded within the resin. This not only adds a rustic charm but also connects the ornament to the natural beauty of the holiday season. When using natural elements, it is important to ensure they are completely dry to prevent any moisture from affecting the resin’s curing process. Furthermore, arranging these elements thoughtfully within the mold can create a visually appealing composition that draws the eye.
For those looking to add a personal touch, consider incorporating photographs or printed images. By using a special type of paper that is compatible with resin, crafters can embed cherished memories into their ornaments. This technique requires careful placement and may involve sealing the image with a layer of clear resin to protect it from damage. The result is a heartfelt ornament that can serve as a keepsake for years to come.
Finally, finishing touches can elevate the overall appearance of the ornaments. Once the resin has fully cured, sanding the edges can create a smooth finish, while a final coat of clear resin can enhance the shine and durability. Adding hooks or ribbons for hanging not only serves a practical purpose but also contributes to the ornament’s aesthetic appeal. By employing these decorating techniques, crafters can create stunning Christmas resin ornaments that reflect their personal style and creativity, making the holiday season even more special.
Q&A
1. **What materials do I need to make Christmas resin ornaments?**
You will need epoxy resin, a mixing cup, stirring sticks, silicone molds, glitter or colorants, and any decorative items like dried flowers or small ornaments.
2. **How do I prepare the resin for pouring?**
Mix equal parts of resin and hardener in a mixing cup according to the manufacturer’s instructions, stirring thoroughly for several minutes until fully combined and clear.
3. **How do I finish the ornaments after the resin has cured?**
Once the resin has fully cured (usually 24-48 hours), remove the ornaments from the molds, sand any rough edges if necessary, and attach a ribbon or hook for hanging.To make Christmas resin ornaments, gather materials such as epoxy resin, silicone molds, decorative elements (like glitter, dried flowers, or small figurines), and safety gear. Prepare the resin according to the manufacturer’s instructions, mixing it thoroughly. Pour the resin into the molds, adding decorative elements as desired. Allow the resin to cure completely, typically 24 hours, before demolding. Once cured, you can sand any rough edges, drill holes for hanging, and finish with a protective topcoat if desired. These personalized ornaments can enhance your holiday decor and make thoughtful gifts.