-
Table of Contents
“Craft Your Style: A Step-by-Step Guide to Stunning UV Resin Earrings!”
Creating beautiful UV resin earrings is a fun and rewarding craft that allows you to express your creativity while making unique accessories. This step-by-step tutorial will guide you through the process of designing and crafting your own stunning earrings using UV resin. From selecting your materials to curing the resin, each step is designed to ensure a successful and enjoyable experience. Whether you’re a beginner or an experienced crafter, this guide will provide you with the knowledge and techniques needed to create eye-catching earrings that showcase your personal style. Get ready to dive into the world of UV resin crafting and unleash your artistic potential!
Materials Needed for UV Resin Earrings
Creating UV resin earrings is an engaging and rewarding craft that allows for a high degree of creativity and personalization. To embark on this artistic journey, it is essential to gather the appropriate materials, as each component plays a crucial role in the final product. First and foremost, the primary ingredient in this endeavor is UV resin itself. This clear, liquid polymer hardens when exposed to ultraviolet light, making it ideal for crafting jewelry. When selecting UV resin, it is advisable to choose a high-quality product that is specifically designed for jewelry making, as this will ensure durability and a glossy finish.
In addition to the resin, a UV light source is necessary for curing the material. UV lamps come in various forms, including handheld devices and larger stationary units. A compact UV lamp is often sufficient for small projects like earrings, as it allows for easy maneuverability and efficient curing. Furthermore, it is important to consider the wattage of the lamp, as higher wattage typically results in faster curing times, which can enhance the overall crafting experience.
Next, one must consider the molds used to shape the earrings. Silicone molds are particularly popular due to their flexibility and ease of use. They come in a variety of shapes and sizes, allowing for endless design possibilities. When selecting molds, it is beneficial to choose those that are specifically designed for resin, as they will provide a smooth finish and facilitate easy removal of the cured pieces. Additionally, using molds with intricate designs can add a unique touch to the earrings, making them stand out.
To enhance the visual appeal of the earrings, various embellishments can be incorporated into the resin. These may include dried flowers, glitter, beads, or even small charms. When choosing embellishments, it is essential to ensure that they are compatible with resin and will not react negatively during the curing process. For instance, natural materials like dried flowers should be thoroughly dried to prevent any moisture from affecting the resin. Moreover, selecting colors and textures that complement one another can elevate the overall aesthetic of the finished earrings.
Another important consideration is the use of earring findings, which are the components that allow the earrings to be worn. Common findings include earring hooks, studs, and hoops, all of which can be easily attached to the cured resin pieces. It is advisable to choose findings that are made from hypoallergenic materials, especially for those with sensitive skin. Additionally, having a variety of findings on hand can provide flexibility in design, allowing for the creation of different styles to suit various tastes.
Finally, one should not overlook the importance of tools and supplies that facilitate the crafting process. Essential tools include a mixing stick for combining resin and hardener, a dropper for precise application, and gloves to protect the hands from any potential mess. A small torch or heat gun can also be useful for removing bubbles that may form in the resin during the curing process. By ensuring that all necessary materials and tools are readily available, the crafting experience can be both enjoyable and efficient.
In conclusion, gathering the right materials is a fundamental step in creating beautiful UV resin earrings. By carefully selecting high-quality resin, appropriate molds, and complementary embellishments, along with the necessary tools and findings, one can embark on a fulfilling creative journey that results in stunning, personalized jewelry pieces.
Step-by-Step Process for Creating UV Resin Earrings
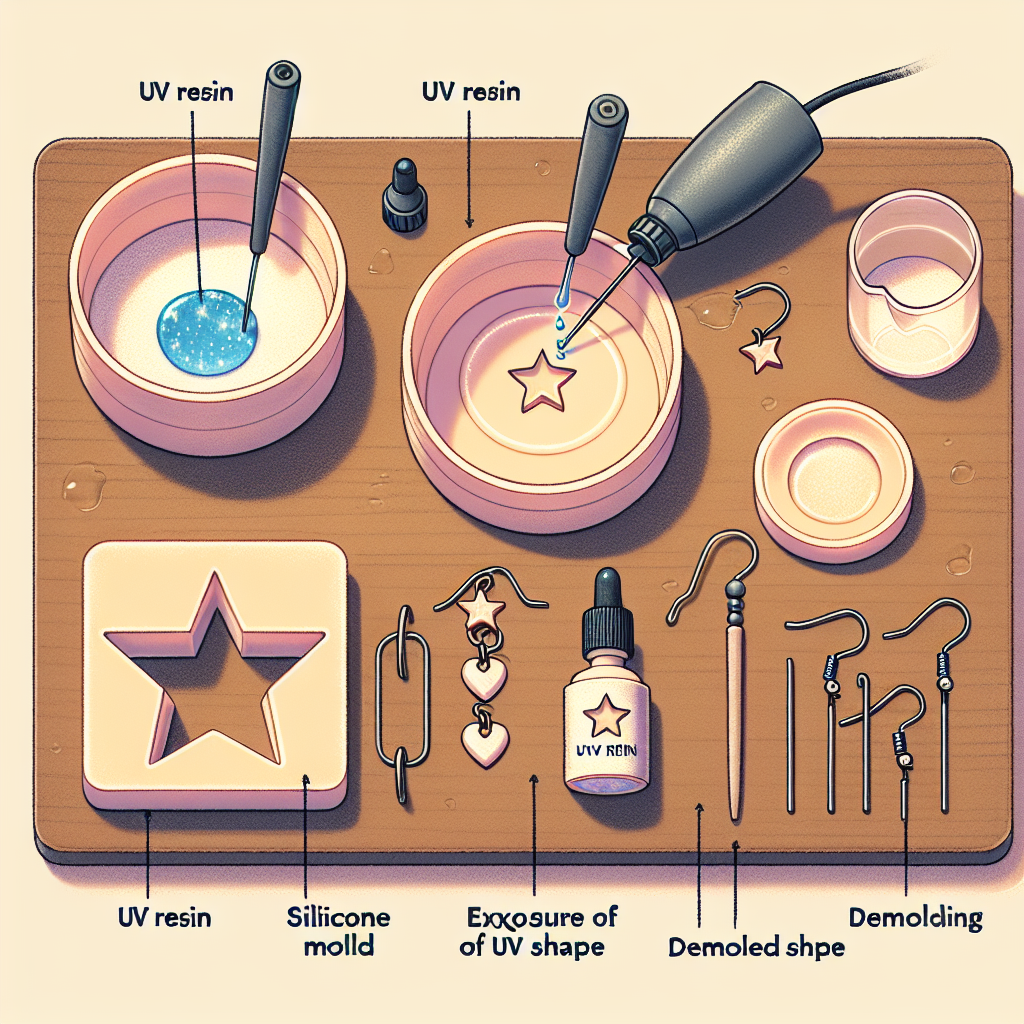
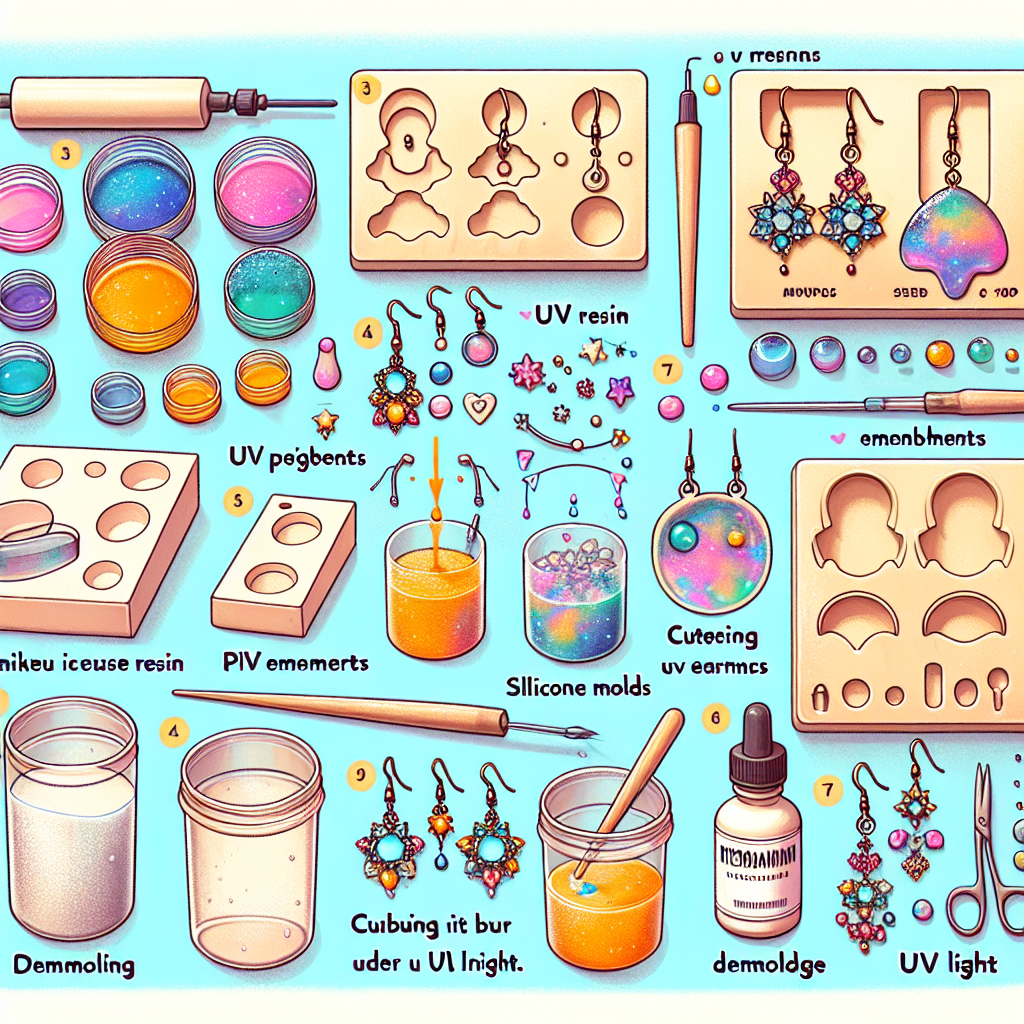
Creating UV resin earrings is a rewarding and creative endeavor that allows individuals to express their artistic flair while producing unique accessories. The process, while straightforward, requires attention to detail and a few essential materials. To begin, gather your supplies, which include UV resin, a UV light source, earring findings, molds, and any decorative elements you wish to incorporate, such as dried flowers, glitter, or pigments. Having everything organized will streamline the process and enhance your overall experience.
Once your materials are assembled, the first step is to prepare your molds. Silicone molds are ideal for this purpose, as they allow for easy removal of the finished product. Before pouring the resin, ensure that the molds are clean and dry. This preparation is crucial, as any debris or moisture can affect the final outcome. After confirming that your molds are ready, you can begin mixing the UV resin. It is important to follow the manufacturer’s instructions regarding the mixing ratio, as improper proportions can lead to issues with curing.
As you mix the resin, consider adding color or decorative elements to achieve the desired aesthetic. For instance, incorporating pigments can create vibrant hues, while adding glitter can introduce a touch of sparkle. When adding these elements, it is advisable to do so gradually, ensuring that the mixture remains homogeneous. Once you are satisfied with the color and consistency, carefully pour the resin into the molds. It is essential to fill the molds slowly to avoid creating air bubbles, which can mar the surface of the earrings. If bubbles do form, a gentle heat source, such as a lighter or heat gun, can be used to eliminate them.
After pouring the resin, the next step involves curing it under a UV light. The duration of exposure will depend on the specific resin used, so it is crucial to refer to the product guidelines. Typically, curing times range from a few minutes to half an hour. During this period, the resin will harden and take on a glossy finish. It is advisable to monitor the curing process closely, as overexposure can lead to discoloration or brittleness.
Once the resin has fully cured, carefully remove the earrings from the molds. This step requires a gentle touch, as excessive force can lead to breakage. If any rough edges are present, they can be smoothed out using fine-grit sandpaper or a nail file. This attention to detail will enhance the overall appearance of the earrings and ensure a comfortable fit when worn.
With the earrings shaped and polished, the final step is to attach the earring findings. This process typically involves using jump rings or earring hooks, which can be easily secured with pliers. It is important to ensure that the findings are securely attached to prevent any mishaps while wearing the earrings. Once the findings are in place, your UV resin earrings are complete and ready to be showcased.
In conclusion, creating UV resin earrings is a delightful process that combines creativity with craftsmanship. By following these steps meticulously, you can produce stunning pieces that reflect your personal style. Whether for personal use or as gifts, these earrings are sure to impress and serve as a testament to your artistic abilities. As you gain experience, feel free to experiment with different designs and techniques, allowing your creativity to flourish in this captivating craft.
Tips for Finishing and Curing UV Resin Earrings
When embarking on the journey of creating UV resin earrings, the finishing and curing processes are crucial steps that can significantly impact the final product. To achieve a polished and professional look, it is essential to pay attention to detail during these stages. First and foremost, ensuring that your workspace is clean and well-organized will facilitate a smoother process. A clutter-free environment minimizes the risk of dust and debris contaminating your resin, which can lead to imperfections in your earrings.
Once you have prepared your workspace, the next step involves mixing the UV resin. It is important to follow the manufacturer’s instructions carefully, as different brands may have varying requirements. Typically, you will need to pour the resin into a mixing cup and stir it thoroughly to eliminate any bubbles. This step is vital because trapped air can create unsightly blemishes in the finished product. To further reduce the likelihood of bubbles, consider using a heat gun or a torch to gently warm the resin after mixing. This technique encourages bubbles to rise to the surface, where they can be popped easily.
After preparing the resin, you can begin pouring it into your earring molds. It is advisable to pour slowly and steadily to avoid overflow and ensure an even distribution. If you are incorporating decorative elements such as glitter, dried flowers, or pigments, now is the time to add them. Carefully place these items into the resin, ensuring they are evenly distributed. This not only enhances the aesthetic appeal of your earrings but also allows for creative expression.
Once the molds are filled, the curing process begins. UV resin cures when exposed to ultraviolet light, so it is essential to have a UV lamp on hand. Position the earrings under the lamp, ensuring that the light reaches all areas of the resin. The curing time can vary depending on the thickness of the resin layer and the strength of the UV light, but generally, a few minutes under a strong UV lamp will suffice. It is advisable to check the manufacturer’s guidelines for specific curing times to achieve optimal results.
After the initial curing, it is prudent to inspect the earrings for any imperfections. If you notice any sticky spots or areas that have not fully cured, simply return them to the UV light for additional time. This step is crucial, as any uncured resin can lead to a tacky finish that detracts from the overall quality of the earrings. Once you are satisfied with the curing, you can carefully remove the earrings from the molds.
The final touches involve sanding and polishing the edges of the earrings. Using fine-grit sandpaper, gently smooth any rough edges to ensure comfort when wearing the earrings. Following this, a polishing compound can be applied to enhance the shine and give the earrings a professional finish. This step not only improves the aesthetic quality but also helps to protect the resin from scratches and wear.
In conclusion, the finishing and curing processes of UV resin earrings are integral to achieving a high-quality product. By maintaining a clean workspace, carefully mixing and pouring the resin, and diligently curing and finishing the earrings, you can create beautiful pieces that showcase your creativity and craftsmanship. With practice and attention to detail, you will master the art of UV resin earring making, resulting in stunning accessories that are sure to impress.
Q&A
1. **What materials are needed for a UV resin earring tutorial?**
– UV resin, earring molds, UV light, mixing tools, pigments or glitter (optional), and earring hooks.
2. **How do you prepare the molds for UV resin?**
– Clean the molds thoroughly to remove any dust or debris, and optionally apply a mold release agent to ensure easy removal of the finished earrings.
3. **What is the curing process for UV resin earrings?**
– Pour the UV resin into the molds, add any desired embellishments, and cure under a UV light for 2-5 minutes until fully hardened.In conclusion, the Step-by-Step UV Resin Earring Tutorial provides a comprehensive guide for creating unique and personalized earrings using UV resin. By following the outlined steps, including preparation, mixing, pouring, curing, and finishing touches, crafters can achieve professional-looking results. This tutorial not only enhances creativity but also offers a rewarding crafting experience, making it accessible for both beginners and experienced artisans.