-
Table of Contents
“Craft Your First UV Resin Keychain: A Simple Guide for Beginners!”
Creating personalized keychains with Easy UV resin is a fun and rewarding craft project perfect for beginners. This tutorial will guide you through the simple steps to make your own unique keychains using UV resin, which cures quickly under UV light, allowing for fast and efficient crafting. You’ll learn about the materials needed, the process of mixing and pouring the resin, and tips for adding decorative elements to make your keychains truly one-of-a-kind. Whether you’re looking to create gifts or simply want to explore a new hobby, this easy UV resin keychain tutorial is an excellent starting point for first-timers.
Essential Tools and Materials for Your First UV Resin Keychain
Creating a UV resin keychain can be an enjoyable and rewarding experience, especially for those who are new to crafting. To embark on this creative journey, it is essential to gather the right tools and materials, as they will significantly influence the outcome of your project. First and foremost, UV resin itself is the star of the show. This clear, liquid resin cures quickly when exposed to UV light, making it an ideal choice for beginners. When selecting UV resin, ensure that you choose a high-quality product that is specifically designed for crafting, as this will yield the best results.
In addition to the resin, you will need a UV light source. There are various options available, including UV lamps and portable UV flashlights. A UV lamp is often preferred for its ability to provide consistent and even exposure, ensuring that the resin cures thoroughly. If you opt for a portable flashlight, be prepared to move it around to cover all areas of your project, as uneven curing can lead to unsatisfactory results.
Next, consider the molds for your keychain. Silicone molds are highly recommended due to their flexibility and ease of use. They come in various shapes and sizes, allowing you to customize your keychain to your liking. When selecting a mold, ensure that it is compatible with UV resin, as some materials may not withstand the curing process. Additionally, having a variety of molds on hand can inspire creativity and experimentation, making your crafting experience even more enjoyable.
To enhance the aesthetic appeal of your keychain, you may want to incorporate decorative elements. These can include dried flowers, glitter, beads, or even small charms. When choosing embellishments, consider how they will interact with the resin. For instance, lighter materials may float to the top during the curing process, while heavier items may sink. It is advisable to experiment with different combinations to achieve the desired effect.
Furthermore, you will need some basic tools to assist in the crafting process. A mixing stick is essential for stirring the resin and ensuring that it is well combined. Additionally, a dropper or pipette can be useful for precisely adding resin to your mold, allowing for greater control and reducing the risk of spills. A pair of gloves is also recommended, as UV resin can be sticky and may irritate the skin. Wearing gloves will help keep your hands clean and protect you from any potential allergens.
Once you have gathered all the necessary materials, it is important to prepare your workspace. A clean, well-lit area will facilitate the crafting process and help you focus on your project. Consider using a silicone mat or parchment paper to protect your work surface from any spills or drips. Having all your tools and materials organized and within reach will streamline the process and make it more enjoyable.
In conclusion, embarking on your first UV resin keychain project requires careful preparation and the right tools and materials. By gathering high-quality UV resin, a reliable UV light source, suitable molds, decorative elements, and basic crafting tools, you will set yourself up for success. With a well-prepared workspace and a little creativity, you will be well on your way to creating beautiful and personalized keychains that reflect your unique style. As you gain experience, you may find yourself exploring more complex designs and techniques, further enhancing your crafting skills.
Step-by-Step Guide to Creating Your First UV Resin Keychain
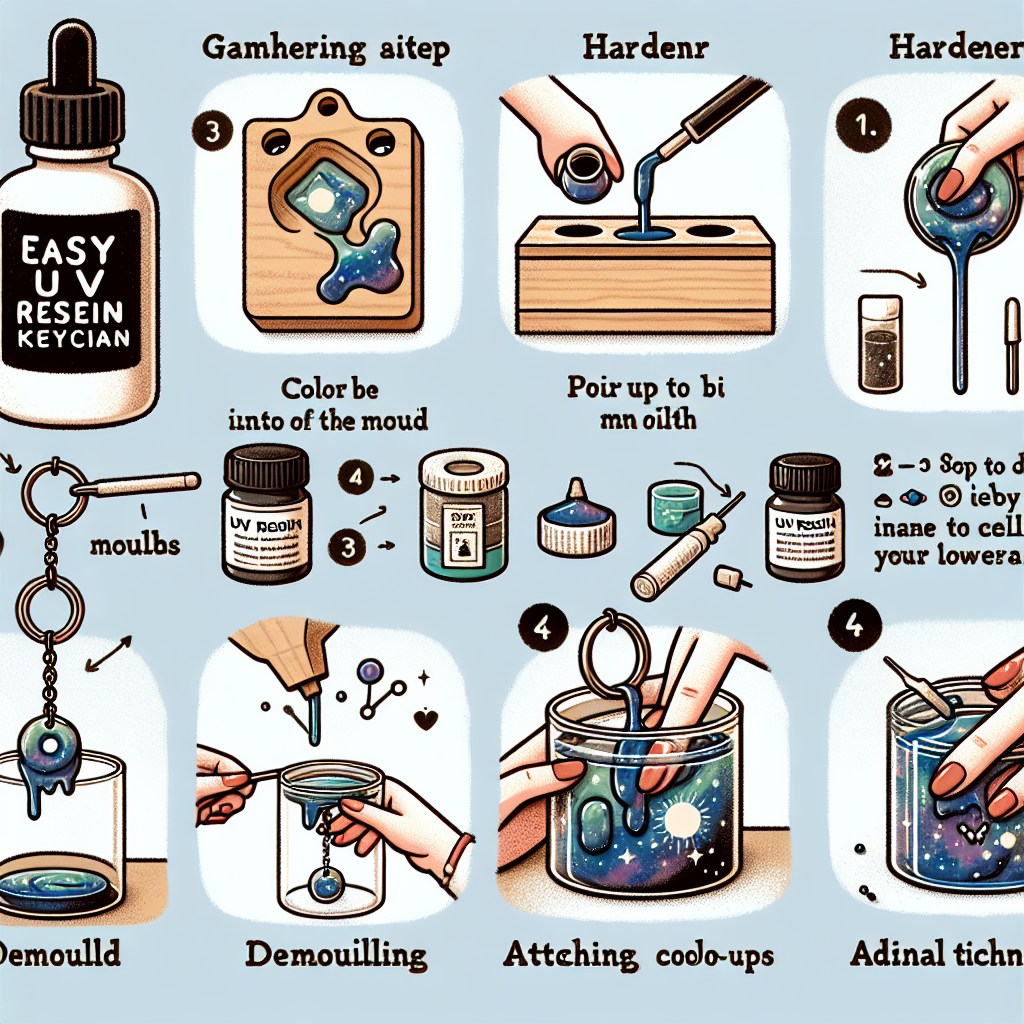
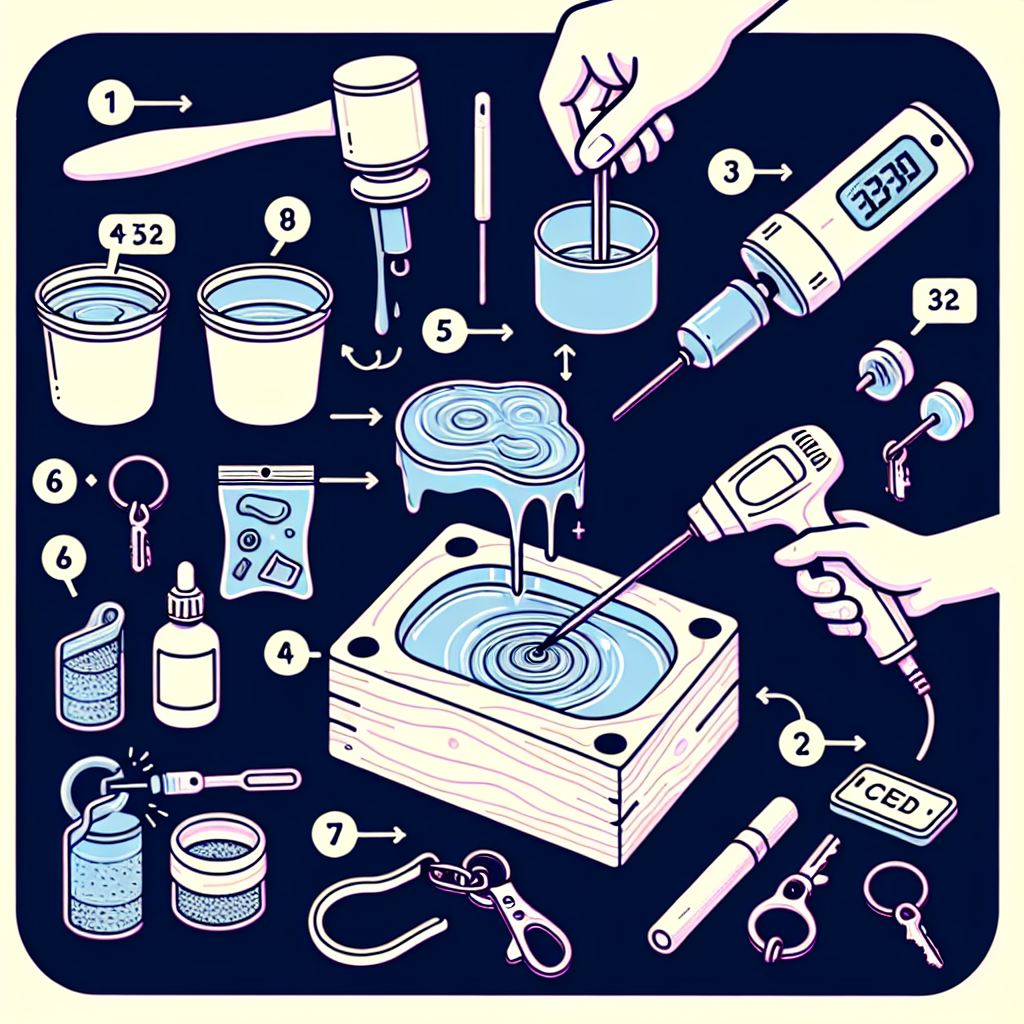
Creating your first UV resin keychain can be an exciting and rewarding experience, especially for those new to crafting. This step-by-step guide will walk you through the process, ensuring that you achieve a beautiful and functional piece of art. To begin, gather all necessary materials, which include UV resin, a UV light source, a keychain hardware kit, and any decorative elements you wish to incorporate, such as dried flowers, glitter, or small charms. Having everything organized will streamline the process and enhance your crafting experience.
Once you have your materials ready, the first step is to prepare your workspace. It is essential to work in a well-ventilated area, as UV resin can emit fumes during the curing process. Lay down a protective covering on your work surface to prevent any spills or stains. After ensuring your workspace is safe and tidy, you can begin by selecting a mold for your keychain. Silicone molds are ideal for this purpose, as they allow for easy removal of the finished product. Choose a mold shape that resonates with your personal style, whether it be a simple geometric design or a more intricate form.
Next, it is time to mix the UV resin. Carefully pour the resin into a mixing cup, following the manufacturer’s instructions regarding the appropriate amount. If you wish to add color to your keychain, now is the moment to incorporate resin dyes or pigments. Stir the mixture thoroughly to ensure an even distribution of color. Once you are satisfied with the color, you can begin adding your decorative elements. This is where creativity comes into play; you can layer dried flowers, sprinkle glitter, or place small charms into the resin. Be mindful of the placement, as this will affect the final appearance of your keychain.
After arranging your decorative elements, pour the mixed resin into the mold. It is advisable to pour slowly to minimize the formation of air bubbles. If bubbles do appear, you can gently use a toothpick or a small tool to pop them. Once the mold is filled, it is crucial to ensure that the resin reaches all corners and crevices, creating a smooth and even surface. At this stage, you may want to add a small loop or attachment point for the keychain hardware, which can be done by inserting a jump ring or a small piece of wire into the resin before it cures.
Now that your mold is prepared, it is time to cure the resin using a UV light source. Place the mold under the UV light for the recommended curing time, typically around 2 to 5 minutes, depending on the thickness of the resin and the strength of the light. It is essential to monitor the curing process closely, as overexposure can lead to discoloration or brittleness. Once the resin has fully cured, carefully remove the keychain from the mold. If any rough edges remain, you can gently sand them down to achieve a polished finish.
Finally, attach the keychain hardware to your newly created piece. This step is straightforward; simply use pliers to open the jump ring, thread it through the loop in your resin piece, and then close it securely. With this final touch, your UV resin keychain is complete, showcasing your creativity and craftsmanship. As you admire your work, take pride in the fact that you have successfully navigated the process of creating a unique and personalized accessory. This experience not only enhances your crafting skills but also opens the door to endless possibilities for future projects.
Tips for Achieving Perfect Results with UV Resin Keychains
Creating UV resin keychains can be a delightful and rewarding experience, especially for those new to crafting. However, achieving perfect results requires attention to detail and a few essential tips that can significantly enhance the final product. First and foremost, it is crucial to select high-quality UV resin. The market offers various brands, and opting for a reputable one can make a substantial difference in clarity, curing time, and overall finish. High-quality resin typically cures to a clear, glossy finish, which is ideal for showcasing embedded items or colors.
Once you have chosen your resin, preparation is key. Ensure that your workspace is clean and well-ventilated, as UV resin can emit fumes during the curing process. Additionally, gather all necessary materials before starting, including molds, pigments, and any decorative elements you wish to incorporate. This organization will streamline the process and minimize the risk of mistakes. When working with molds, it is advisable to use silicone molds, as they allow for easy demolding and provide a smooth surface for the keychain.
As you begin mixing the resin, it is essential to follow the manufacturer’s instructions carefully. Typically, UV resin does not require mixing with a hardener, but if you are using a two-part resin, ensure that you measure the components accurately. Inaccurate ratios can lead to incomplete curing or a tacky finish. Once mixed, you can add pigments or glitter to achieve your desired color and effect. However, it is wise to start with small amounts, as a little can go a long way. This approach allows for better control over the final appearance of the keychain.
When pouring the resin into the mold, take your time to avoid creating bubbles. Bubbles can detract from the overall look of the keychain, so it is beneficial to pour slowly and steadily. If bubbles do form, a heat gun or a lighter can be used to gently pass over the surface, causing them to rise and pop. However, caution is necessary, as excessive heat can cause the resin to cure improperly. After pouring, it is advisable to let the resin sit for a few minutes before curing to allow any remaining bubbles to escape.
Curing the resin is a critical step in the process. UV resin typically cures under a UV light or sunlight, and the duration can vary depending on the thickness of the pour and the intensity of the light source. It is essential to follow the recommended curing time to ensure that the resin hardens completely. If the resin remains tacky after the initial curing period, additional exposure to UV light may be necessary. Once cured, carefully remove the keychain from the mold, taking care not to bend or damage it.
Finally, finishing touches can elevate your keychain from good to great. Sanding the edges can create a polished look, while adding a keyring or other hardware can enhance functionality. Additionally, consider applying a layer of clear sealant for added durability, especially if the keychain will be subjected to frequent use. By following these tips, first-timers can achieve stunning results with their UV resin keychains, transforming simple materials into beautiful, personalized accessories. With practice and patience, crafting with UV resin can become an enjoyable and fulfilling hobby, allowing for endless creativity and expression.
Q&A
1. **What materials do I need for an Easy UV Resin Keychain?**
You will need UV resin, a UV light source, keychain hardware (like rings and chains), molds (silicone or plastic), and optional decorative items (like glitter, dried flowers, or pigments).
2. **How do I cure the UV resin?**
After pouring the UV resin into the mold and adding any decorations, expose it to a UV light for about 2-5 minutes until it hardens completely.
3. **Can I use regular resin instead of UV resin?**
No, regular resin requires a longer curing time and is not suitable for quick projects like keychains. UV resin is specifically designed for fast curing under UV light.The Easy UV Resin Keychain Tutorial for First-Timers provides a straightforward and enjoyable introduction to resin crafting. By following the step-by-step instructions, beginners can create personalized and unique keychains while learning essential techniques for working with UV resin. This hands-on project not only fosters creativity but also builds confidence in using resin, making it an ideal starting point for those new to the craft. Overall, the tutorial empowers first-timers to explore their artistic potential and enjoy the rewarding experience of creating custom accessories.