-
Table of Contents
“Master UV Resin Curing: Essential Tips and Tools for Flawless Finishes!”
Curing UV resin properly is essential for achieving strong, durable, and clear results in various crafting and repair projects. UV resin is a versatile material that hardens when exposed to ultraviolet light, making it popular for jewelry making, model building, and other creative applications. To ensure optimal curing, it is important to understand the right techniques and tools to use. This guide will provide essential tips and tools for effectively curing UV resin, helping you avoid common pitfalls and achieve professional-quality finishes in your projects.
Proper UV Light Selection for Curing Resin
When it comes to curing UV resin effectively, the selection of the appropriate UV light is paramount. The right light not only ensures that the resin cures thoroughly but also enhances the quality of the final product. To begin with, it is essential to understand the different types of UV lights available on the market. Common options include UV LED lamps and traditional UV fluorescent lamps. Each type has its own advantages and disadvantages, which can significantly impact the curing process.
UV LED lamps are increasingly popular due to their energy efficiency and longevity. They emit a specific wavelength of light, typically around 365 to 405 nanometers, which is ideal for curing most UV resins. One of the primary benefits of using UV LED lamps is their ability to cure resin quickly, often within minutes. Additionally, they generate less heat compared to traditional fluorescent lamps, reducing the risk of damaging delicate projects. However, it is crucial to ensure that the UV LED lamp you choose is compatible with the specific resin you are using, as not all resins cure effectively under every type of UV light.
On the other hand, traditional UV fluorescent lamps have been used for many years in various applications, including resin curing. These lamps emit a broader spectrum of UV light, which can be beneficial for certain types of resin. However, they tend to take longer to cure the resin, often requiring several minutes to achieve a complete cure. Furthermore, fluorescent lamps can generate significant heat, which may pose a risk to sensitive materials or intricate designs. Therefore, while they can be effective, careful monitoring of the curing process is necessary to avoid overheating.
In addition to the type of UV light, the wattage of the lamp also plays a critical role in the curing process. Higher wattage lamps typically provide more intense light, which can lead to faster and more thorough curing. However, it is essential to balance wattage with the specific requirements of your resin and project. Overexposure to high-intensity UV light can lead to issues such as discoloration or brittleness in the cured resin. Consequently, it is advisable to follow the manufacturer’s recommendations regarding the appropriate wattage and exposure time for optimal results.
Moreover, the distance between the UV light source and the resin is another factor that can influence the curing process. Generally, the closer the light source is to the resin, the more effective the curing will be. However, it is important to avoid placing the light too close, as this can lead to uneven curing or overheating. A distance of a few inches is often ideal, but this can vary depending on the specific lamp and resin being used. Experimenting with different distances can help you find the optimal setup for your particular project.
Finally, it is worth noting that proper maintenance of your UV light source is essential for consistent performance. Regularly cleaning the lamp and ensuring that it is free from dust and debris will help maintain its efficiency. Additionally, replacing bulbs as needed will ensure that you are always working with a reliable light source. By carefully selecting the right UV light and following these guidelines, you can achieve excellent results in your UV resin projects, ensuring that your creations are not only beautiful but also durable and long-lasting.
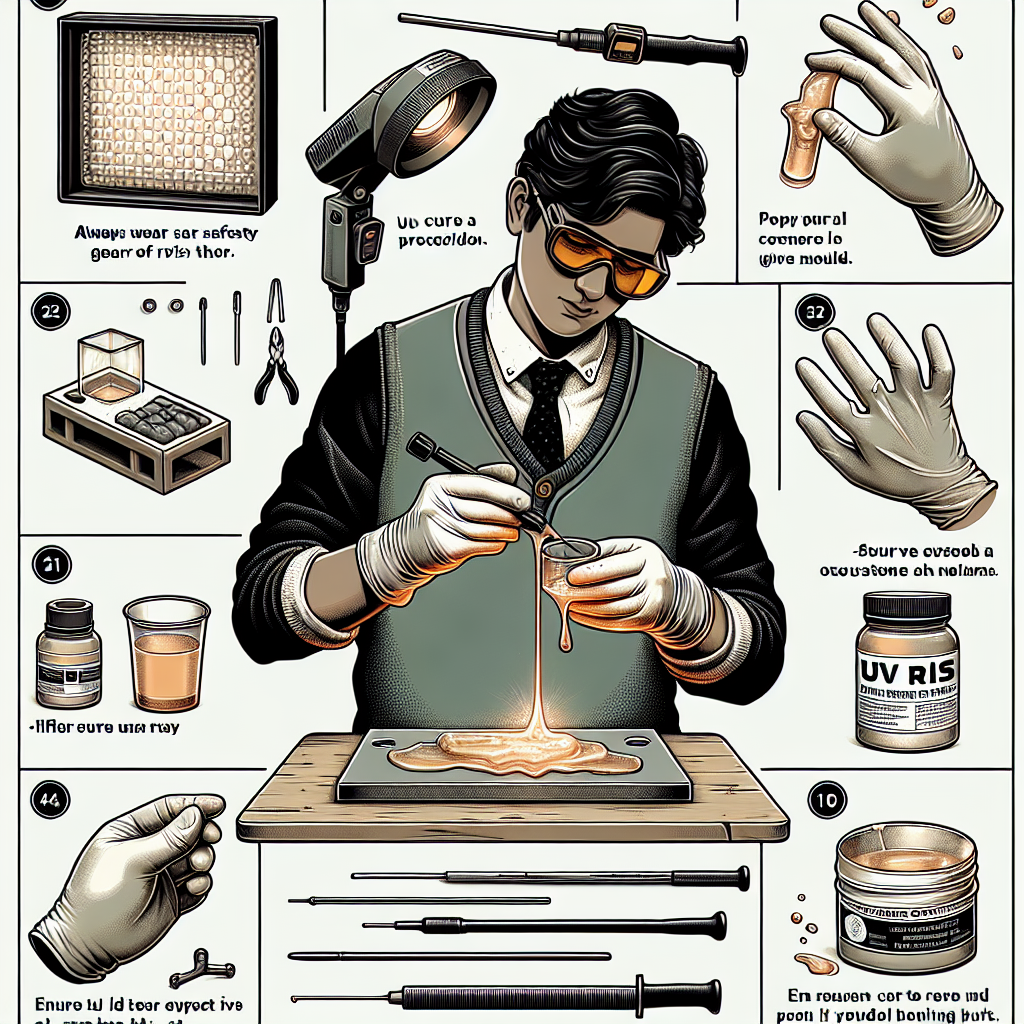
Essential Tools for Effective UV Resin Curing
When working with UV resin, having the right tools is crucial for achieving optimal results. The curing process, which transforms liquid resin into a solid state, relies heavily on the effectiveness of the tools employed. To begin with, a high-quality UV light source is indispensable. UV lamps come in various forms, including handheld flashlights, desktop units, and larger curing stations. Each type has its advantages, but it is essential to select a lamp that emits the appropriate wavelength, typically around 365 to 405 nanometers, to ensure efficient curing. A lamp with adjustable intensity can also be beneficial, as it allows for customization based on the specific project requirements.
In addition to a reliable UV light source, a UV resin mixing cup is another essential tool. These cups are designed to withstand the resin’s chemical properties and often feature measurement markings for precise mixing. Using a dedicated mixing cup helps prevent contamination and ensures that the resin is mixed thoroughly, which is vital for achieving a uniform cure. Furthermore, silicone mixing tools, such as spatulas or sticks, are recommended for their ease of cleaning and ability to scrape the sides of the cup effectively, minimizing waste.
Moreover, protective gear should not be overlooked when working with UV resin. Safety goggles and gloves are necessary to protect the eyes and skin from potential irritation caused by the resin. Additionally, a well-ventilated workspace is crucial, as the fumes released during the curing process can be harmful if inhaled in large quantities. By prioritizing safety, artisans can focus on their creative endeavors without compromising their health.
Another important tool for effective UV resin curing is a heat gun or a torch. While UV light is the primary method for curing resin, applying gentle heat can help eliminate bubbles that may form during the mixing process. This step is particularly important for achieving a clear finish, as trapped air can mar the appearance of the final product. However, caution must be exercised when using heat, as excessive temperatures can lead to warping or other damage to the resin.
In addition to these tools, a level surface is essential for ensuring even curing. A flat workspace allows the resin to settle properly, preventing uneven surfaces or pooling. Using a silicone mat can provide a non-stick surface that is easy to clean and protects the underlying work area from spills. Furthermore, having a variety of molds on hand can enhance creativity and versatility in projects. Silicone molds are particularly popular due to their flexibility and ease of use, allowing for intricate designs and shapes.
Lastly, a digital scale can be a valuable addition to the toolkit, especially for projects requiring precise measurements of resin and hardener. Accurate ratios are critical for ensuring a successful cure, and a digital scale provides the precision needed for consistent results. By incorporating these essential tools into the resin crafting process, artisans can enhance their efficiency and improve the quality of their finished products.
In conclusion, the proper curing of UV resin hinges on the selection and use of essential tools. From a reliable UV light source to protective gear and mixing supplies, each component plays a vital role in achieving a successful outcome. By investing in quality tools and prioritizing safety, crafters can unlock the full potential of UV resin, leading to stunning and durable creations.
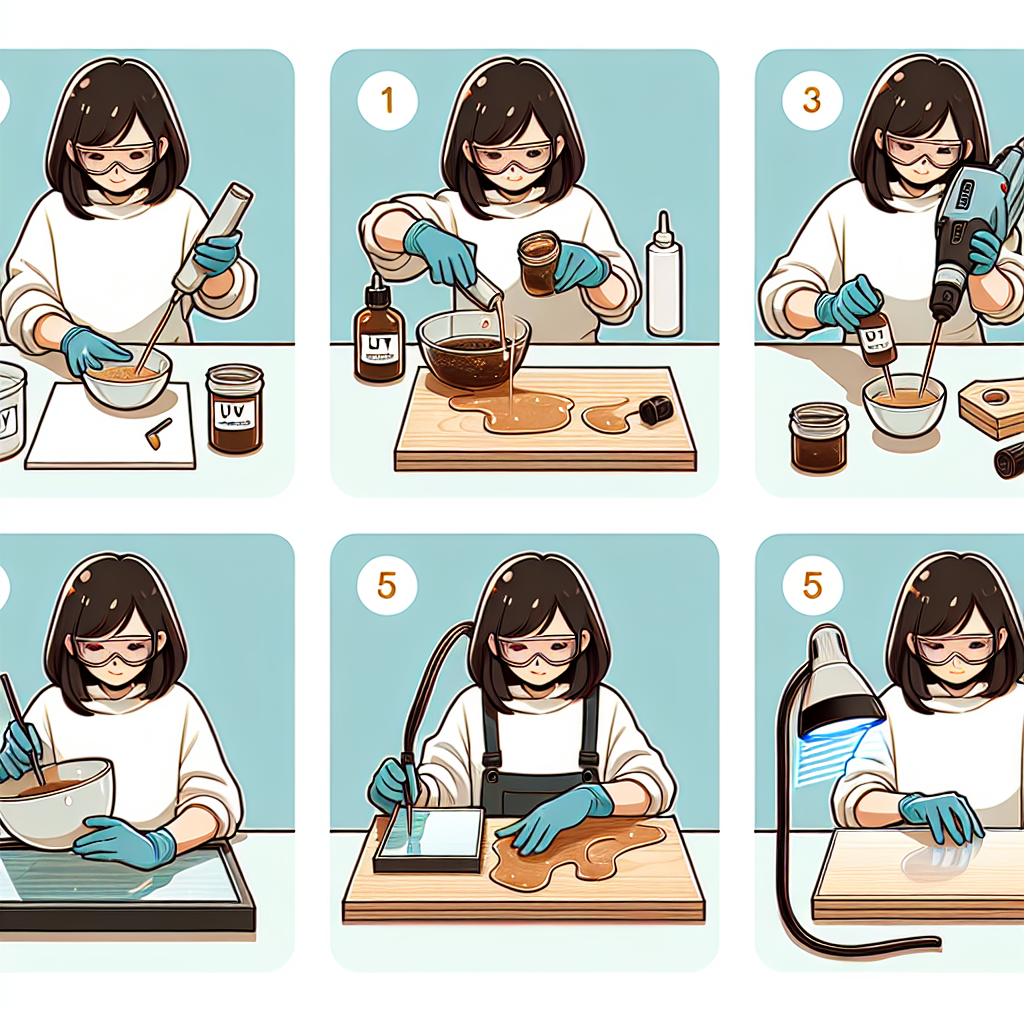
Step-by-Step Guide to Achieving a Flawless UV Resin Finish
Achieving a flawless UV resin finish requires a careful approach, combining the right techniques with appropriate tools. To begin, it is essential to gather all necessary materials before starting the process. This includes UV resin, a UV light source, mixing tools, and any molds or surfaces where the resin will be applied. Having everything on hand not only streamlines the workflow but also minimizes the risk of errors during the curing process.
Once the materials are prepared, the next step involves measuring and mixing the UV resin. It is crucial to follow the manufacturer’s instructions regarding the mixing ratio, as improper proportions can lead to incomplete curing or undesirable results. After measuring the resin, pour it into a clean mixing container and stir gently to avoid introducing air bubbles. This step is vital, as air bubbles can mar the surface of the finished product. To further reduce the likelihood of bubbles, consider using a heat gun or torch briefly over the mixed resin, which can help to release trapped air.
After mixing, the resin can be poured into the chosen mold or onto the surface. It is advisable to pour slowly and steadily to minimize splashing and ensure an even distribution. If working with intricate designs or multiple layers, it may be beneficial to pour in thin layers, allowing each layer to cure before adding the next. This method not only enhances the overall appearance but also provides better control over the final outcome.
Once the resin is in place, the curing process begins. Position the UV light source at an appropriate distance from the resin, ensuring that the entire surface is exposed to the light. The curing time can vary depending on the thickness of the resin layer and the strength of the UV light, so it is important to monitor the process closely. Generally, a few minutes under a strong UV lamp will suffice for thin layers, while thicker applications may require longer exposure. During this time, it is advisable to avoid moving the piece to prevent any disturbances that could affect the finish.
After the initial curing period, it is essential to check for any uncured spots. If any areas remain tacky or soft, additional exposure to UV light may be necessary. In some cases, flipping the piece over to ensure all sides receive adequate light can be beneficial. Once fully cured, the resin should feel hard and smooth to the touch, indicating that the process has been successful.
To achieve an even more polished finish, consider sanding the surface lightly with fine-grit sandpaper. This step can help eliminate any imperfections and create a glass-like appearance. Following sanding, a final layer of UV resin can be applied to enhance the shine and provide additional protection. After applying this final layer, repeat the curing process as before, ensuring that the entire surface is adequately exposed to UV light.
In conclusion, achieving a flawless UV resin finish involves careful preparation, precise mixing, and attentive curing. By following these steps and utilizing the right tools, one can create stunning resin pieces that showcase clarity and brilliance. With practice and patience, the art of working with UV resin can lead to impressive results, making it a rewarding endeavor for both beginners and experienced crafters alike.
Q&A
1. **What is the best light source for curing UV resin?**
A: The best light source for curing UV resin is a UV LED lamp specifically designed for resin curing, as it emits the correct wavelength of UV light for optimal curing.
2. **How long should I cure UV resin under a UV light?**
A: Typically, UV resin should be cured for 2 to 5 minutes under a UV light, but curing time may vary based on the thickness of the resin layer and the strength of the light source.
3. **What tips can improve the curing process of UV resin?**
A: To improve the curing process, ensure the resin is applied in thin layers, avoid direct sunlight during curing, and rotate the piece periodically to ensure even exposure to UV light.To cure UV resin properly, ensure you have a high-quality UV light source that emits the correct wavelength for the resin you are using. Prepare your workspace by using a clean, dust-free environment and consider using a UV-safe surface. Apply the resin in thin layers to promote even curing and avoid bubbles. Rotate your project regularly under the UV light to ensure all areas receive adequate exposure. Monitor the curing time as specified by the resin manufacturer, and consider using a UV flashlight for spot curing. Finally, always wear protective gear to safeguard against UV exposure. Following these tips and utilizing the right tools will result in a well-cured, durable finish for your UV resin projects.