-
Table of Contents
“Unlock Your Creativity: A Beginner’s Guide to Mastering UV Resin Art!”
UV resin is a versatile and user-friendly material that allows beginners to create stunning crafts and jewelry with ease. This introduction will guide you through the essential steps to get started with UV resin, covering the necessary tools, safety precautions, and basic techniques. Whether you’re looking to make unique accessories, decorative items, or personalized gifts, understanding the fundamentals of UV resin will empower you to unleash your creativity and produce beautiful, professional-looking results. With just a few supplies and a little practice, you’ll be on your way to mastering this exciting medium.
Essential Tools and Materials for UV Resin Beginners
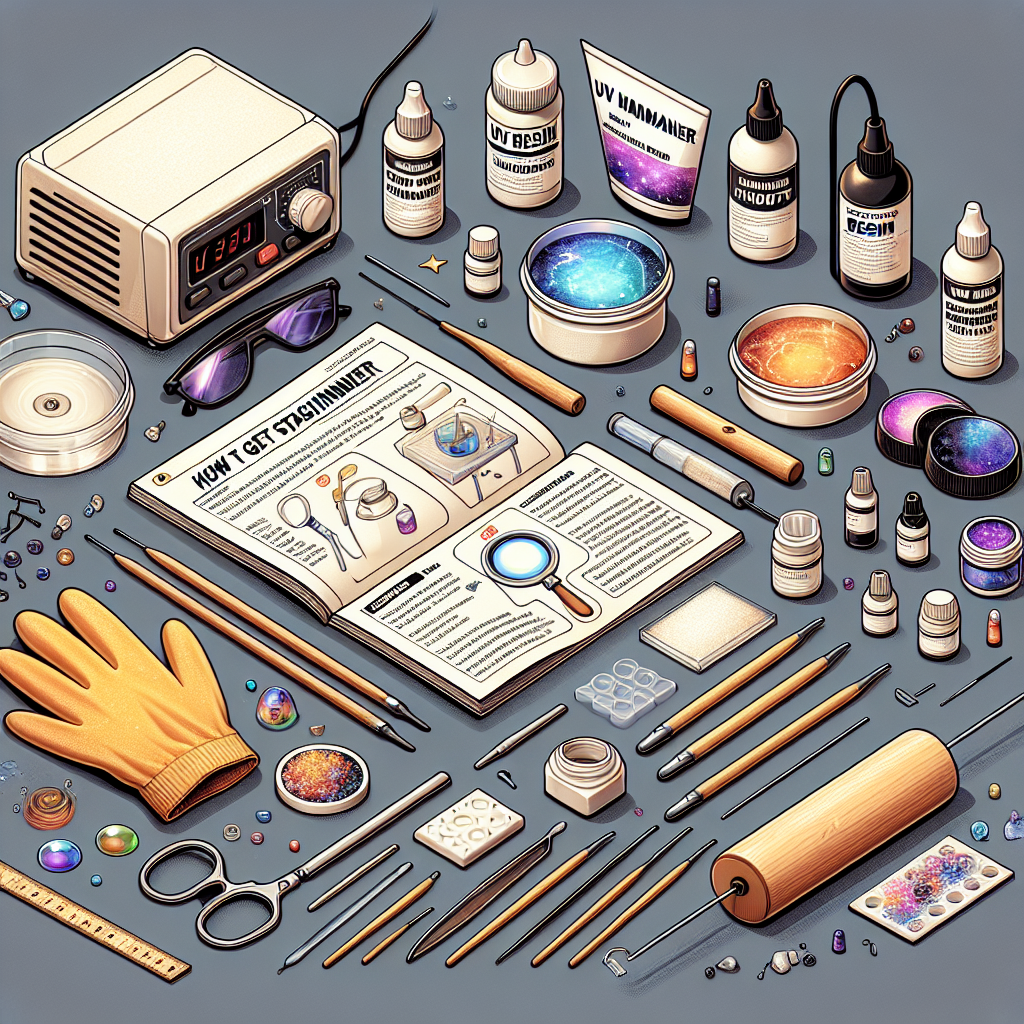
Getting started with UV resin can be an exciting venture for beginners, as it opens up a world of creative possibilities. However, before diving into the crafting process, it is essential to gather the right tools and materials to ensure a smooth and enjoyable experience. Understanding the fundamental components will not only enhance your crafting skills but also help you achieve the desired results in your projects.
To begin with, the most crucial material you will need is, of course, UV resin itself. This type of resin is unique because it cures quickly when exposed to ultraviolet light, making it ideal for various applications, including jewelry making, coasters, and decorative items. When selecting UV resin, it is advisable to choose a high-quality product that is specifically designed for crafting. This ensures that the resin is clear, has minimal bubbles, and cures effectively under UV light.
In addition to the resin, a UV light source is essential for the curing process. There are various options available, including UV lamps, nail curing lamps, and even sunlight. However, for consistent results, a dedicated UV lamp is recommended, as it provides a controlled environment for curing. When selecting a lamp, consider the wattage and the size of the lamp to ensure it can accommodate your projects effectively.
Moreover, having a set of mixing tools is vital for beginners. These tools typically include disposable cups, stir sticks, and measuring spoons. Mixing cups allow you to measure and combine the resin and hardener accurately, while stir sticks help to blend the components thoroughly. It is important to mix the resin according to the manufacturer’s instructions to achieve optimal results. Additionally, using disposable tools can simplify the cleanup process, allowing you to focus on your creative endeavors.
Furthermore, protective gear should not be overlooked. While UV resin is generally safe to use, it is wise to wear gloves to protect your skin from potential irritation. Additionally, a mask can be beneficial if you are working in a poorly ventilated area, as it helps to filter out any fumes that may be released during the curing process. Safety should always be a priority, especially when working with new materials.
As you embark on your UV resin journey, consider investing in molds and embellishments. Molds come in various shapes and sizes, allowing you to create unique items tailored to your preferences. Silicone molds are particularly popular, as they are flexible and make it easy to remove the cured resin without damaging the finished product. Additionally, embellishments such as glitter, dried flowers, or pigments can add a personal touch to your creations, enhancing their visual appeal.
Lastly, a well-organized workspace is essential for any crafting endeavor. Designate a specific area where you can work on your projects without distractions. Ensure that the space is well-lit and has adequate ventilation. Keeping your tools and materials organized will not only streamline the crafting process but also make it easier to find what you need when inspiration strikes.
In conclusion, starting with UV resin requires a few essential tools and materials that will set the foundation for your creative journey. By gathering high-quality resin, a reliable UV light source, mixing tools, protective gear, molds, and embellishments, you will be well-equipped to explore the endless possibilities that UV resin offers. With a well-organized workspace and a commitment to safety, you can embark on this exciting crafting adventure with confidence.
Step-by-Step Guide to Creating Your First UV Resin Project
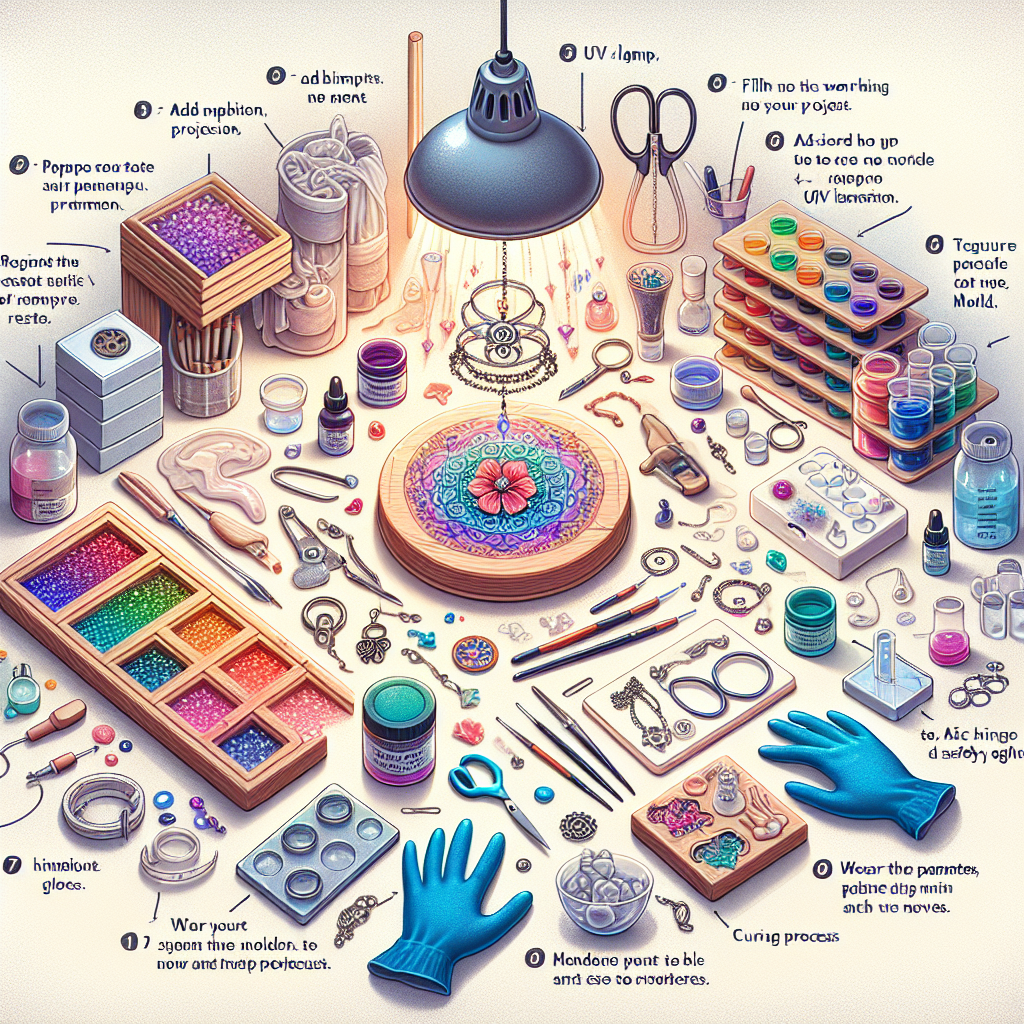
Getting started with UV resin can be an exciting venture for absolute beginners, as it opens up a world of creative possibilities. To embark on your first UV resin project, it is essential to follow a step-by-step guide that ensures a smooth and successful experience. First and foremost, gather all necessary materials. You will need UV resin, a UV light source, mixing tools, molds, and any decorative elements you wish to incorporate, such as glitter, dried flowers, or pigments. Having everything organized will streamline the process and minimize interruptions.
Once you have your materials ready, the next step is to prepare your workspace. It is crucial to work in a well-ventilated area, as UV resin can emit fumes during the curing process. Additionally, protect your work surface with a disposable covering, such as a plastic sheet or newspaper, to prevent any accidental spills from damaging your furniture. With your workspace set up, you can now move on to the fun part: mixing the resin.
Begin by carefully measuring the appropriate amount of UV resin according to the instructions provided by the manufacturer. It is important to note that UV resin typically comes in a two-part system, which requires mixing a resin and a hardener. However, many beginner-friendly UV resins are pre-mixed and ready to use. If you are using a pre-mixed resin, simply pour the desired amount into a mixing cup. If your resin requires mixing, follow the recommended ratios closely to ensure proper curing. After measuring, use a stir stick to mix the resin thoroughly, ensuring that there are no bubbles trapped in the mixture.
Once your resin is mixed, it is time to pour it into your chosen mold. Take your time during this step, as pouring too quickly can create air bubbles. To minimize bubbles, consider pouring the resin slowly and from a low height. If you do notice any bubbles forming, you can gently use a heat gun or a lighter to pop them, but be cautious not to overheat the resin. After pouring, you can add any decorative elements you desire. This is where your creativity can shine, as you can layer colors, embed objects, or create unique designs.
After you have completed your design, the next step is to cure the resin. Place your mold under a UV light source, ensuring that the light is evenly distributed across the surface of the resin. The curing time will vary depending on the thickness of the resin layer and the strength of your UV light, but it typically ranges from a few minutes to an hour. It is advisable to check the manufacturer’s instructions for specific curing times. During this period, avoid moving the mold to prevent any disturbances in the curing process.
Once the resin has fully cured, you can carefully remove it from the mold. If you encounter any resistance, gently flex the mold to release the resin piece. At this stage, you may want to sand any rough edges or apply a topcoat for added shine. Finally, take a moment to admire your creation. Completing your first UV resin project not only provides a sense of accomplishment but also serves as a stepping stone for future projects. As you gain confidence and experience, you can explore more complex designs and techniques, further enhancing your skills in this captivating medium.
Common Mistakes to Avoid When Starting with UV Resin
When embarking on the journey of working with UV resin, beginners often encounter a variety of challenges that can hinder their creative process. Understanding these common mistakes is essential for achieving successful results and enjoying the crafting experience. One of the most prevalent errors is underestimating the importance of proper preparation. Before diving into a project, it is crucial to ensure that the workspace is clean and organized. Dust, debris, or even fingerprints can mar the final product, leading to disappointment. Therefore, taking the time to set up a dedicated area free from contaminants can significantly enhance the quality of the finished piece.
Another frequent mistake is neglecting to read the instructions provided by the resin manufacturer. Each brand may have specific guidelines regarding mixing ratios, curing times, and safety precautions. Failing to adhere to these instructions can result in a variety of issues, such as incomplete curing or undesirable chemical reactions. Consequently, beginners should familiarize themselves with the product they are using, as this knowledge will empower them to make informed decisions throughout the crafting process.
Moreover, many newcomers to UV resin overlook the importance of using the right tools and materials. For instance, using incompatible molds or additives can lead to poor results. It is advisable to invest in high-quality silicone molds designed specifically for resin, as these will facilitate easy demolding and reduce the risk of damage to the finished piece. Additionally, when incorporating pigments or glitter, beginners should ensure that these materials are compatible with UV resin to avoid any adverse effects on the curing process.
In addition to these preparatory steps, timing plays a critical role in working with UV resin. Beginners often rush through the curing process, either by exposing the resin to UV light for insufficient time or by attempting to manipulate the resin before it has fully set. It is essential to allow the resin to cure completely, as this ensures durability and prevents issues such as tackiness or cloudiness. Patience is key; taking the time to let the resin cure properly will yield a more professional-looking result.
Furthermore, another common pitfall is overloading the resin with too many embellishments or inclusions. While it may be tempting to add numerous decorative elements, doing so can interfere with the curing process and lead to uneven results. Instead, beginners should start with a few carefully chosen additions and gradually experiment with more complex designs as they gain confidence and experience.
Safety is another critical aspect that should not be overlooked. Many beginners underestimate the importance of protective gear when working with UV resin. It is advisable to wear gloves and a mask to avoid skin contact and inhalation of fumes. Additionally, ensuring proper ventilation in the workspace can help mitigate any potential health risks associated with resin use.
Lastly, beginners should not be discouraged by initial setbacks. Mistakes are an inherent part of the learning process, and each error provides valuable lessons that contribute to skill development. By acknowledging these common mistakes and taking proactive steps to avoid them, newcomers to UV resin can enhance their crafting experience and create beautiful, lasting pieces. Embracing patience, preparation, and safety will ultimately lead to greater satisfaction and success in the world of UV resin crafting.
Q&A
1. **What materials do I need to get started with UV resin?**
You will need UV resin, a UV light source (like a UV lamp or sunlight), mixing tools (like stir sticks), molds or surfaces for your projects, gloves, and a protective workspace.
2. **How do I prepare my workspace for working with UV resin?**
Ensure your workspace is well-ventilated, cover surfaces with a protective layer (like plastic or silicone), and have all your materials organized and within reach to avoid spills.
3. **What are the basic steps to use UV resin?**
First, mix the resin if needed, then pour it into your mold or onto your surface. Use a UV light to cure the resin for the recommended time (usually a few minutes), and once cured, you can demold or finish your project.To get started with UV resin for absolute beginners, first gather essential supplies such as UV resin, a UV light source, mixing tools, and molds. Familiarize yourself with safety precautions, including working in a well-ventilated area and wearing gloves. Start with simple projects to practice techniques like layering, embedding objects, and color mixing. Experiment with different molds and additives to discover your style. Finally, allow your creations to cure fully under the UV light, and enjoy the process of learning and creating with UV resin. With practice and creativity, you can develop your skills and produce beautiful resin art.