-
Table of Contents
“Craft Stunning Transparent UV Resin Pendants: Illuminate Your Creativity!”
Creating transparent UV resin pendants is a rewarding craft that allows you to encapsulate various materials and designs in a glossy, durable finish. This guide will walk you through the essential steps and materials needed to make stunning pendants that showcase your creativity. From selecting the right UV resin to curing techniques and finishing touches, you’ll learn how to craft unique pieces that can be worn or gifted. Whether you’re a beginner or an experienced crafter, this process offers endless possibilities for personalization and artistic expression.
Choosing The Right UV Resin For Your Pendant
When embarking on the journey of creating transparent UV resin pendants, the selection of the appropriate UV resin is a critical first step that can significantly influence the final outcome of your project. The market offers a variety of UV resins, each with distinct properties, making it essential to understand the characteristics that will best suit your artistic vision. To begin with, it is important to consider the clarity of the resin. High-quality UV resins are designed to be crystal clear, allowing for the vibrant colors and intricate details of embedded materials to shine through. This clarity is particularly important for pendants, as it enhances the aesthetic appeal and ensures that the final piece is visually striking.
In addition to clarity, the viscosity of the resin plays a crucial role in the crafting process. A medium to low viscosity resin is often preferred for pendant making, as it flows easily into molds and around any decorative elements you may wish to include. This fluidity not only facilitates the creation of intricate designs but also minimizes the risk of air bubbles forming during the curing process. Consequently, when selecting your UV resin, it is advisable to look for products that specifically mention low bubble formation or easy pour characteristics.
Moreover, the curing time of the resin is another vital factor to consider. UV resin typically cures quickly when exposed to UV light, which can be advantageous for those looking to complete their projects in a timely manner. However, it is essential to ensure that the resin you choose has a curing time that aligns with your working pace. Some resins may require longer exposure to UV light to achieve a complete cure, while others may harden almost instantaneously. Understanding these nuances will help you plan your workflow effectively, allowing for a seamless crafting experience.
Furthermore, the flexibility and durability of the cured resin should not be overlooked. A high-quality UV resin will yield a finished product that is not only visually appealing but also robust enough to withstand daily wear and tear. This durability is particularly important for pendants, which are often subjected to various environmental factors. Therefore, it is advisable to select a resin that is specifically formulated for jewelry making, as these products are typically designed to offer enhanced strength and resilience.
In addition to these technical aspects, it is also beneficial to consider the safety features of the resin. Many manufacturers provide information regarding the non-toxicity of their products, which is an important consideration for those who may be sensitive to certain chemicals. Opting for a UV resin that is labeled as non-toxic can provide peace of mind, especially for those who may be working in enclosed spaces or with children.
Lastly, it is wise to read reviews and seek recommendations from fellow crafters when choosing your UV resin. Personal experiences can provide valuable insights into the performance and reliability of different brands, helping you make an informed decision. By taking the time to carefully select the right UV resin for your pendant-making endeavors, you will set a solid foundation for creating beautiful, transparent pieces that reflect your unique artistic style. Ultimately, the right resin will not only enhance the visual appeal of your pendants but also ensure their longevity, allowing you to enjoy your creations for years to come.
Step-By-Step Guide To Creating Transparent UV Resin Pendants
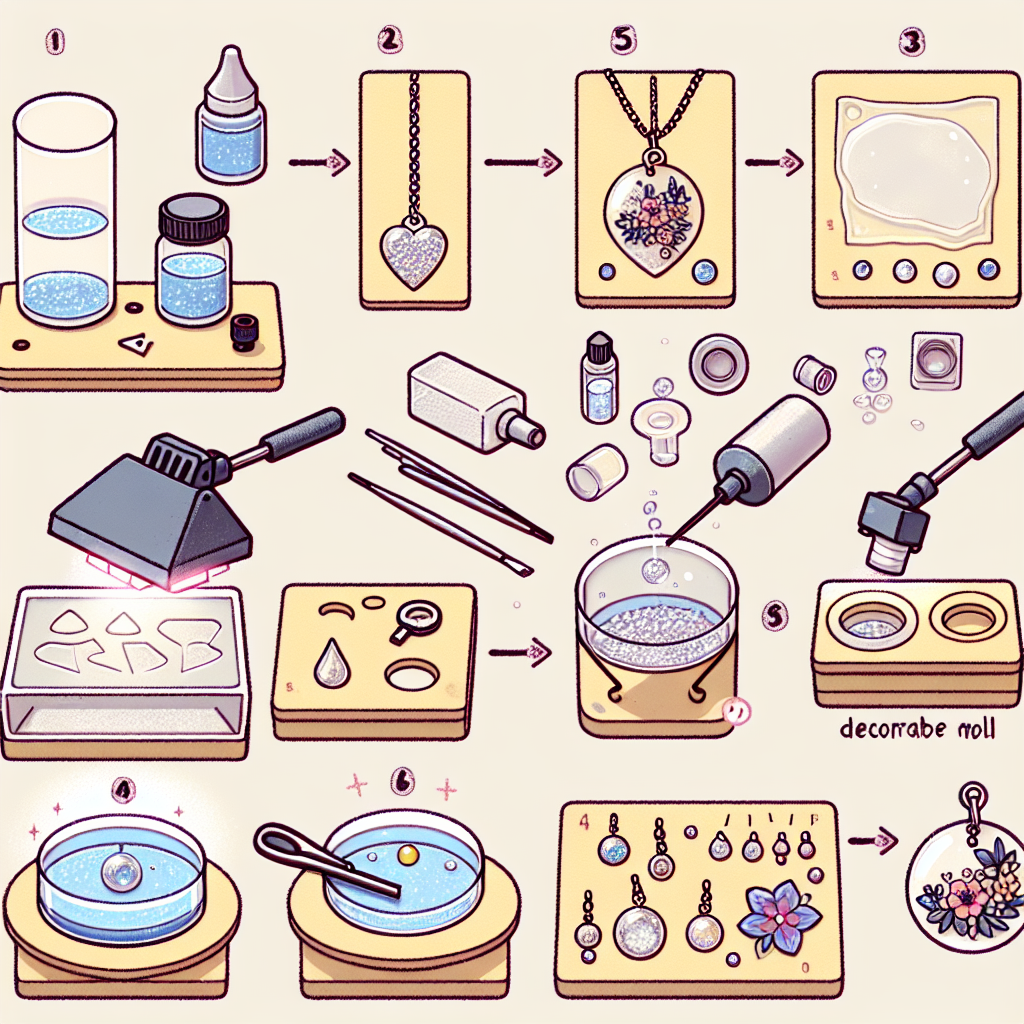
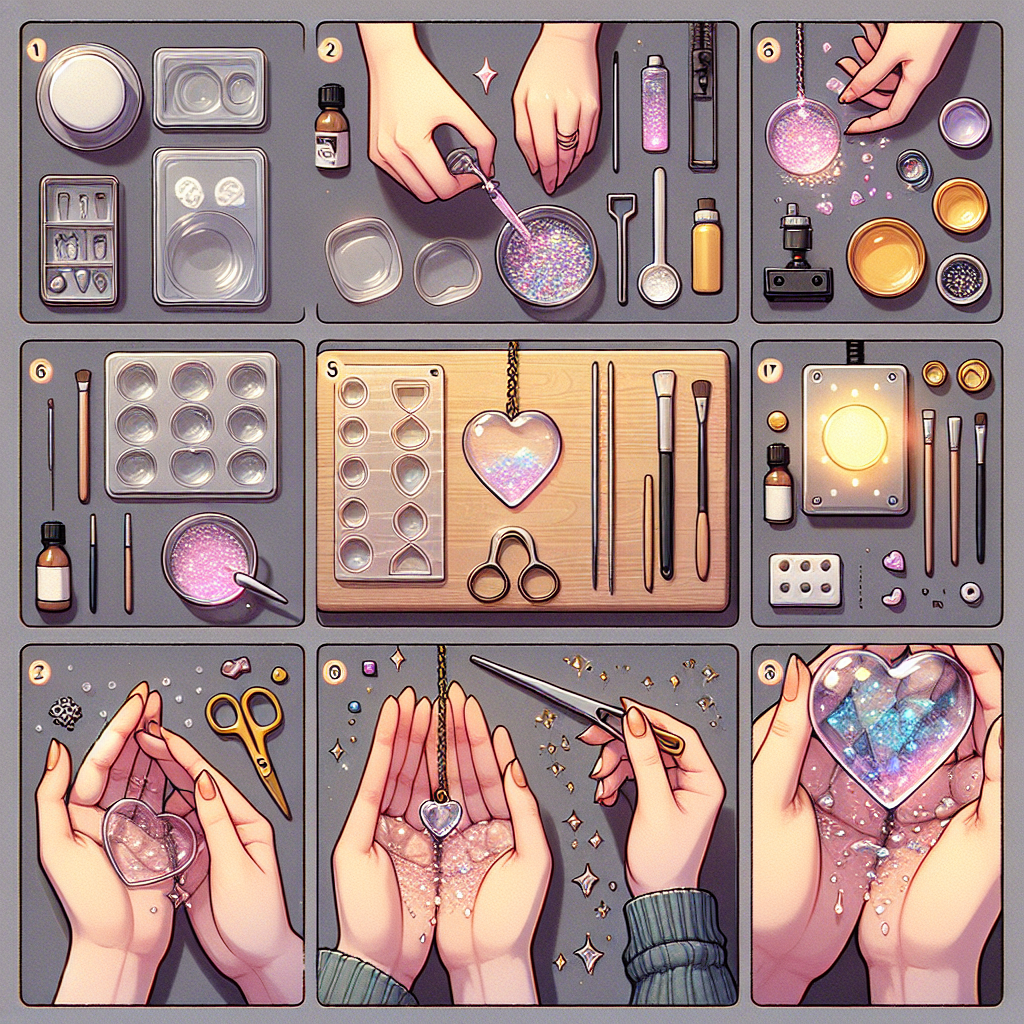
Creating transparent UV resin pendants is a rewarding and creative endeavor that allows artisans to express their individuality while crafting unique pieces of jewelry. The process, while straightforward, requires attention to detail and a few essential materials. To begin, gather your supplies, which include UV resin, a UV light source, a mold for the pendant, and any decorative elements you wish to incorporate, such as dried flowers, glitter, or small charms. Having everything organized will streamline the process and enhance your overall experience.
Once your materials are assembled, the first step is to prepare your mold. Ensure that it is clean and dry, as any dust or moisture can affect the final appearance of your pendant. If you are using a silicone mold, it is often beneficial to apply a thin layer of mold release spray to facilitate easy removal of the finished piece. After preparing the mold, you can begin to mix the UV resin. It is crucial to follow the manufacturer’s instructions regarding the mixing ratio, as improper proportions can lead to issues with curing. Pour the resin into a mixing cup and stir it gently to avoid introducing bubbles, which can mar the clarity of the final product.
With the resin mixed, you can now add any decorative elements you desire. This is where creativity comes into play; you might choose to incorporate vibrant colors, delicate flowers, or even tiny photographs. When placing these items into the resin, ensure they are evenly distributed to achieve a balanced look. Once you are satisfied with the arrangement, carefully pour the resin into the mold, filling it to the desired level. It is advisable to pour slowly to minimize the formation of air bubbles. If bubbles do appear, you can use a toothpick or a small heat source, such as a lighter, to gently pop them.
After pouring the resin, the next step is to cure it using a UV light. Position the mold under the UV light, ensuring that it is evenly exposed to the rays. The curing time can vary depending on the thickness of the resin layer and the strength of the UV light, but it typically ranges from a few minutes to half an hour. During this time, the resin will harden and take on a glossy finish. It is essential to monitor the curing process closely, as overexposure can lead to discoloration or brittleness.
Once the resin has fully cured, carefully remove the pendant from the mold. If you have used a silicone mold, this should be a straightforward process. However, if you encounter any resistance, gently flex the mold to release the pendant without damaging it. After removal, inspect the pendant for any imperfections, such as sharp edges or uneven surfaces. If necessary, you can use fine-grit sandpaper to smooth out these areas, ensuring a polished finish.
Finally, to complete your transparent UV resin pendant, consider adding a jump ring or a bail for attaching it to a chain or cord. This final touch not only enhances the aesthetic appeal but also makes the pendant ready for wear. In conclusion, creating transparent UV resin pendants is an enjoyable and fulfilling craft that combines artistry with technique. By following these steps and allowing your creativity to flourish, you can produce stunning pieces that reflect your personal style and make wonderful gifts for others.
Tips For Adding Color And Embellishments To Your UV Resin Pendants
Creating transparent UV resin pendants offers a unique opportunity to express creativity while crafting beautiful, personalized jewelry. One of the most exciting aspects of working with UV resin is the ability to incorporate color and embellishments, which can significantly enhance the aesthetic appeal of your pendants. To achieve stunning results, it is essential to understand the various techniques and materials available for adding color and embellishments to your creations.
To begin with, selecting the right colorants is crucial. UV resin is compatible with a variety of coloring agents, including alcohol inks, mica powders, and resin dyes. Alcohol inks are particularly popular due to their vibrant hues and ability to blend seamlessly into the resin. When using alcohol inks, it is advisable to start with a small amount, as a little goes a long way. This allows for better control over the intensity of the color, enabling you to achieve the desired effect without overwhelming the transparency of the resin. Mica powders, on the other hand, provide a shimmery finish that can add depth and dimension to your pendants. When incorporating mica powders, it is beneficial to mix them thoroughly into the resin to ensure an even distribution of color and sparkle.
In addition to colorants, incorporating embellishments can elevate your pendants to a new level of artistry. Dried flowers, glitter, and small charms are popular choices that can create visually striking designs. When using dried flowers, it is essential to ensure they are completely dry to prevent any moisture from affecting the resin. Placing the flowers strategically within the pendant can create a beautiful layered effect, allowing the natural beauty of the flowers to shine through the transparent resin. Glitter, on the other hand, can add a playful touch to your pendants. However, it is important to use fine glitter to avoid clumping, which can detract from the overall appearance. A light sprinkle of glitter can create a magical, twinkling effect when the pendant catches the light.
Moreover, layering techniques can be employed to create depth and interest in your pendants. By pouring multiple layers of resin, each with different colors or embellishments, you can achieve a three-dimensional look. For instance, you might start with a clear layer, followed by a layer infused with alcohol ink, and then finish with a layer containing glitter or small charms. Allowing each layer to cure before adding the next is crucial, as this ensures that the layers adhere properly and maintain their distinct appearances.
Furthermore, experimenting with different shapes and molds can also enhance the overall design of your pendants. Silicone molds come in various forms, allowing for endless possibilities in terms of size and shape. By choosing unique molds, you can create pendants that stand out and reflect your personal style. Additionally, consider using silicone molds that have intricate designs or textures, as these can add an extra dimension to your finished piece.
Finally, patience is key when working with UV resin. Allowing adequate curing time and taking the time to perfect each layer will result in a polished and professional-looking pendant. By following these tips for adding color and embellishments, you can create stunning transparent UV resin pendants that not only showcase your creativity but also serve as beautiful accessories or thoughtful gifts. With practice and experimentation, the possibilities are truly endless, allowing you to develop your unique style in the world of resin jewelry making.
Q&A
1. **What materials do I need to make transparent UV resin pendants?**
You will need UV resin, a UV light source, pendant molds, mixing tools, gloves, and any decorative elements like glitter or dried flowers.
2. **How do I prepare the mold for pouring UV resin?**
Clean the mold thoroughly to remove any dust or debris, then apply a mold release agent if necessary to ensure easy removal of the finished pendant.
3. **How long should I cure the UV resin under the UV light?**
Cure the UV resin for about 2-5 minutes under a UV light, ensuring it is fully hardened before removing it from the mold.To make transparent UV resin pendants, gather your materials, including UV resin, a mold, and any desired inclusions. Prepare your workspace and ensure proper ventilation. Mix the UV resin according to the manufacturer’s instructions, pour it into the mold, and add any decorative elements. Use a UV light to cure the resin, following the recommended exposure time. Once fully cured, demold the pendant and finish any edges if necessary. Finally, attach a jump ring or cord for wearing. This process results in beautiful, custom pendants that showcase creativity and craftsmanship.